Create and delete groups
Create a group
 Role required: Organization Manager

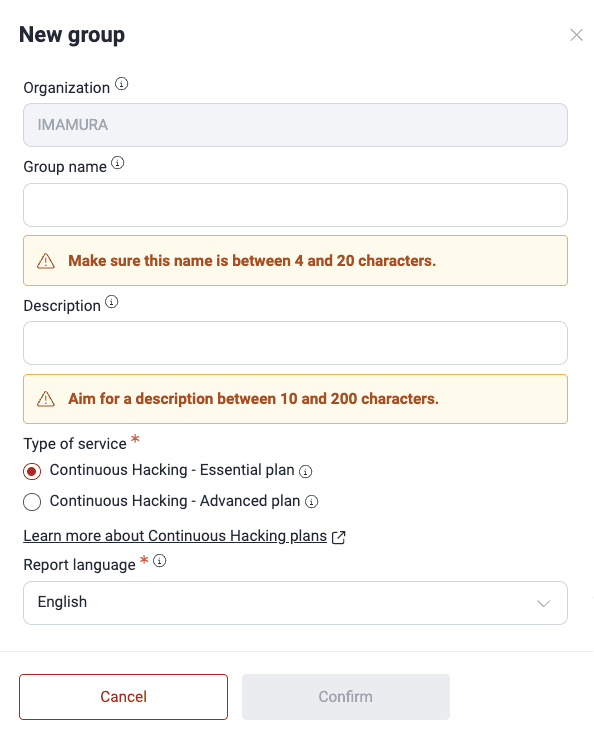
- Organization: The name of the organization in which the group is to be created
- Group name: The name for your group, preferably something short and easy to remember
- Description: The description that may help identify the software development project to which that group is associated
- Type of service: The desired AppSec testing methodology, which can be one of the following:
- Continuous Hacking - Essential plan: Continuous security testing and help in remediation are performed through Fluid Attacks' automated tools only
- Continuous Hacking - Advanced plan: Your team wishes Fluid Attacks to secure your software with the Essential plan features plus pentesters' continuous security testing and help in understanding vulnerabilities
- Report language: The language in which you would like your reports to be


When you are finished setting up your new group, you can click Confirm. The group is then added to your group table immediately, and you are all set to start working on this vulnerability management project.

Delete a group
 Role required: Group Manager

- Go to the Scope section of the group in question.
- In the Scope section, scroll all the way down until you see Delete this group. If you cannot locate it, this should mean that you do not have the Group Manager role in this group and thus lack the necessary permission.
- Click on the Delete this group button.
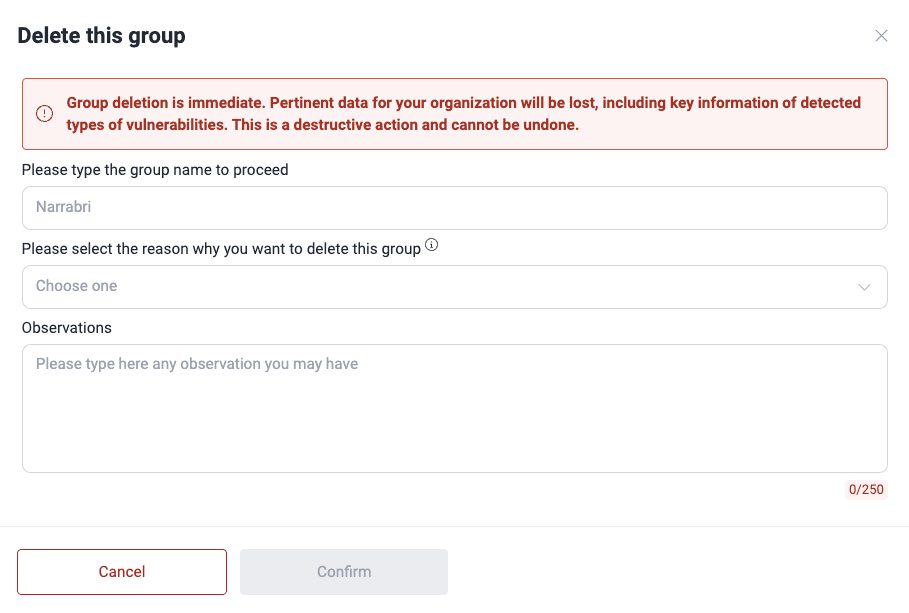
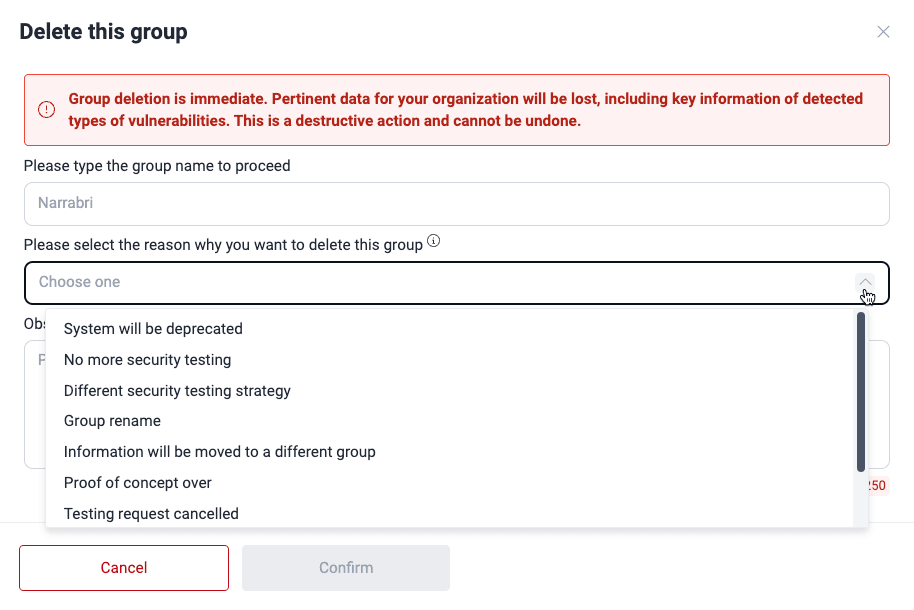
- A confirmation pop-up window appears in which must type the name of the group you wish to delete and an observation about its deletion. You may also choose a reason for deletion (see the explanation for each option below). Click on the Confirm button to complete the deletion of the group.


 You need to make sure that you want to proceed with the deletion of the group, as there is no way of retrieving information of your group after you complete it.
Provide a reason for group deletion
 Role required: Group Manager
System will be deprecated: Development will not go on in the repository or repositories that make up the group.
No more security testing: Your team does not require further testing of the system(s) associated to the group.
Different security testing strategy: Your team decided to change the AppSec testing provider for the system(s) associated to the group.
Group rename: The name of the group is to be changed to a more appropriate name for the project.
Information will be moved to a different group: The scope in that group will be moved to another group either because it will be merged with another project or because the information in it needs to be restructured.
Proof of concept over: The proof of concept has ended.
Testing request cancelled: Your team wishes to cancel security testing of a group before its start.
Created by mistake: Your team has created the group by accident.
Other reason not mentioned here: Of the eight previous reasons, none apply to why your team is deleting the group.