Import repositories fast and safely with OAuth
Enable OAuth
 Role required: Organization Manager
You can connect Fluid Attacks' platform to your account on the code repository hosting providers GitLab, GitHub, Bitbucket and Azure via OAuth (Open Authorization). Allowing this connection, you authorize Fluid Attacks to access the repositories there to clone them without you having to share your credentials with Fluid Attacks.
 Note: You can use OAuth during the sign-up process. To learn how, read Import repositories to test.
The following is a step-by-step example of using OAuth for Fluid Attacks to access your GitLab repositories.
- Go to your organization's Credentials section.
- Select the provider that you want to authorize to connect to the platform (in this example, GitLab).
- Upon choosing the provider, you are directed to their authorization page, where you are asked to authorize the connection between Fluid Attacks' platform and your account.
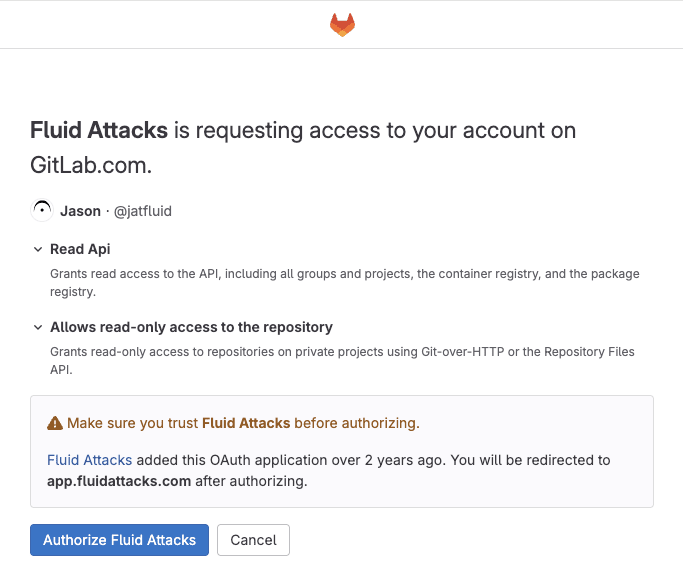
- Click on Authorize to establish the connection.
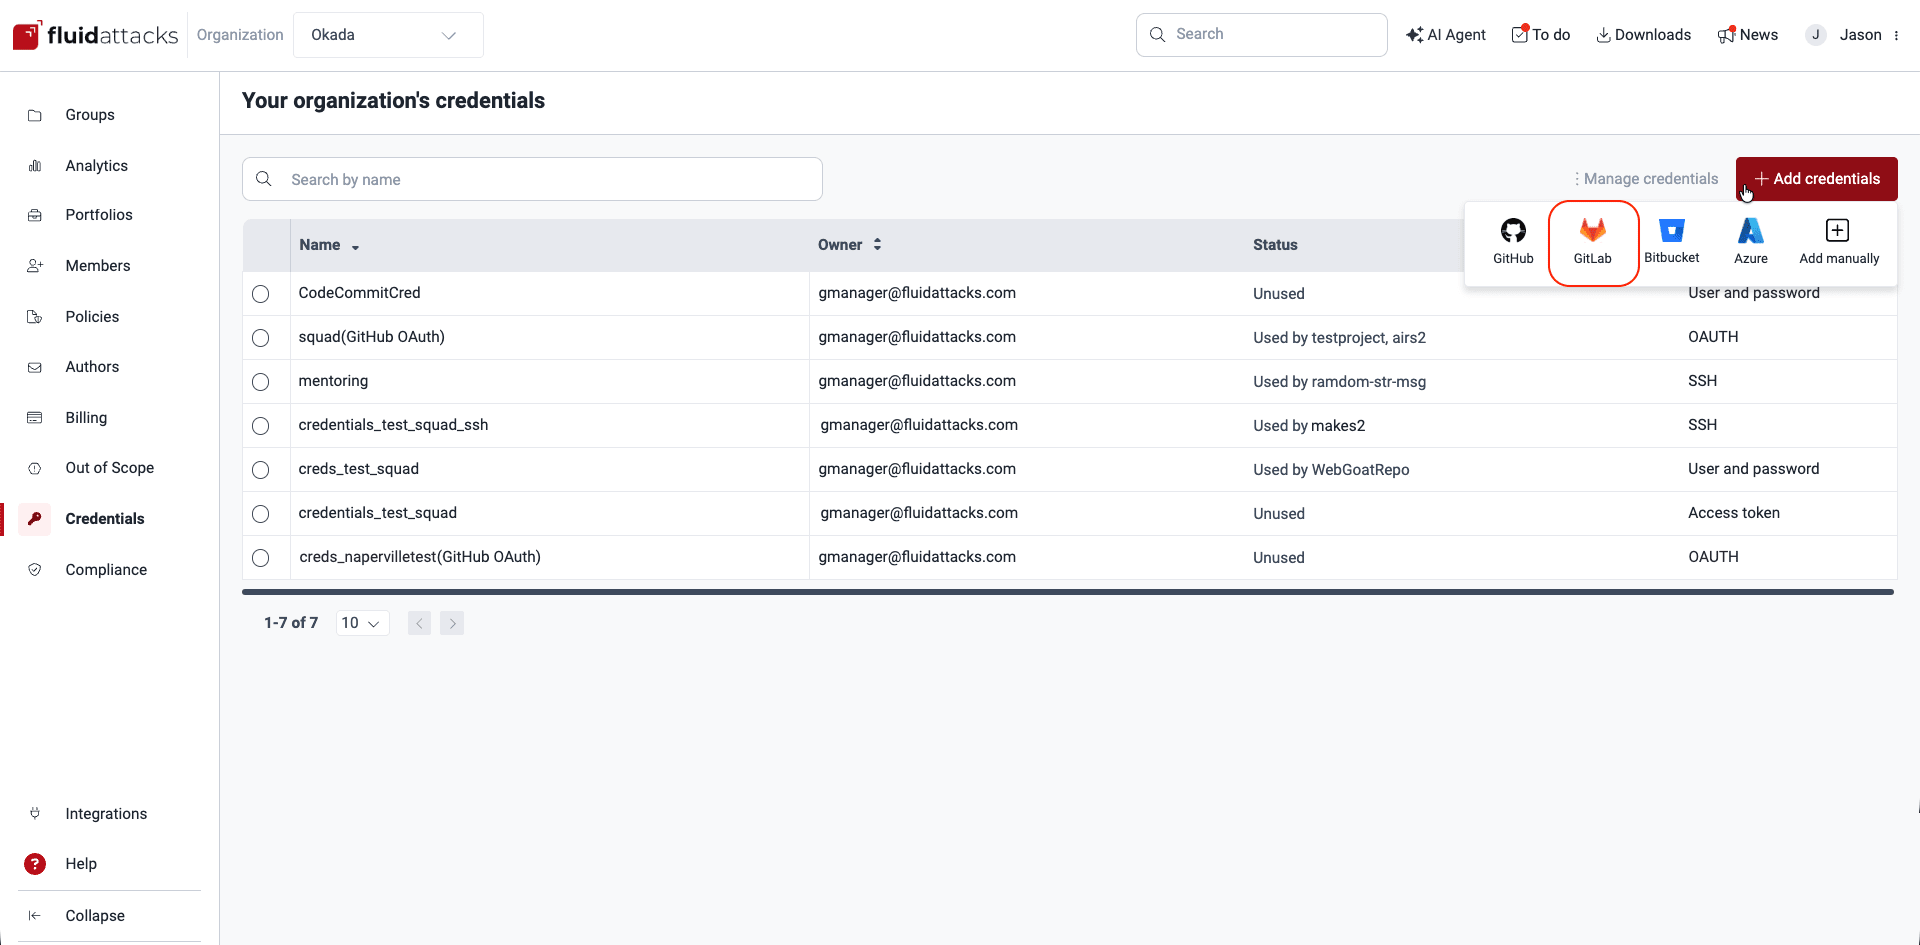
When you authorize the connection, you are redirected to your organization's Credentials section, where you can see the new credentials created with the type 'OAUTH'.
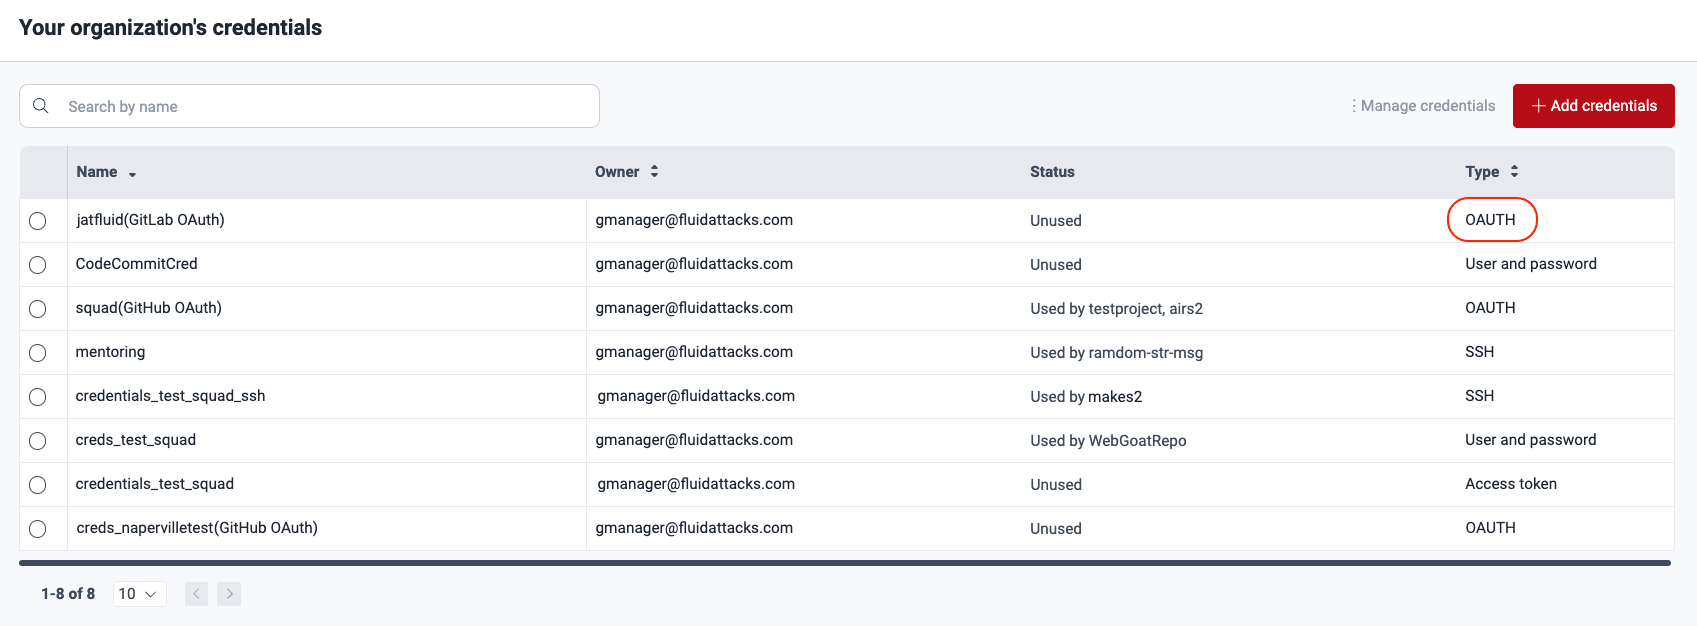
 Note: From the moment the connection is established, the hosting provider you selected is no longer shown in the Add credentials options.
This method recognizes the repositories that have had activity in the last 60 days. To see a list of them, go to the Out of Scope section from the collapsible sidebar.

The repositories that are listed in Out of Scope are those that are not associated with any group of that specific organization in the platform. Please allow approximately 30 minutes to 1 hour for the repositories to appear while the service connection is established.
Import repositories

Role required: Organization Manager
Follow these steps to import a single repository leveraging OAuth:
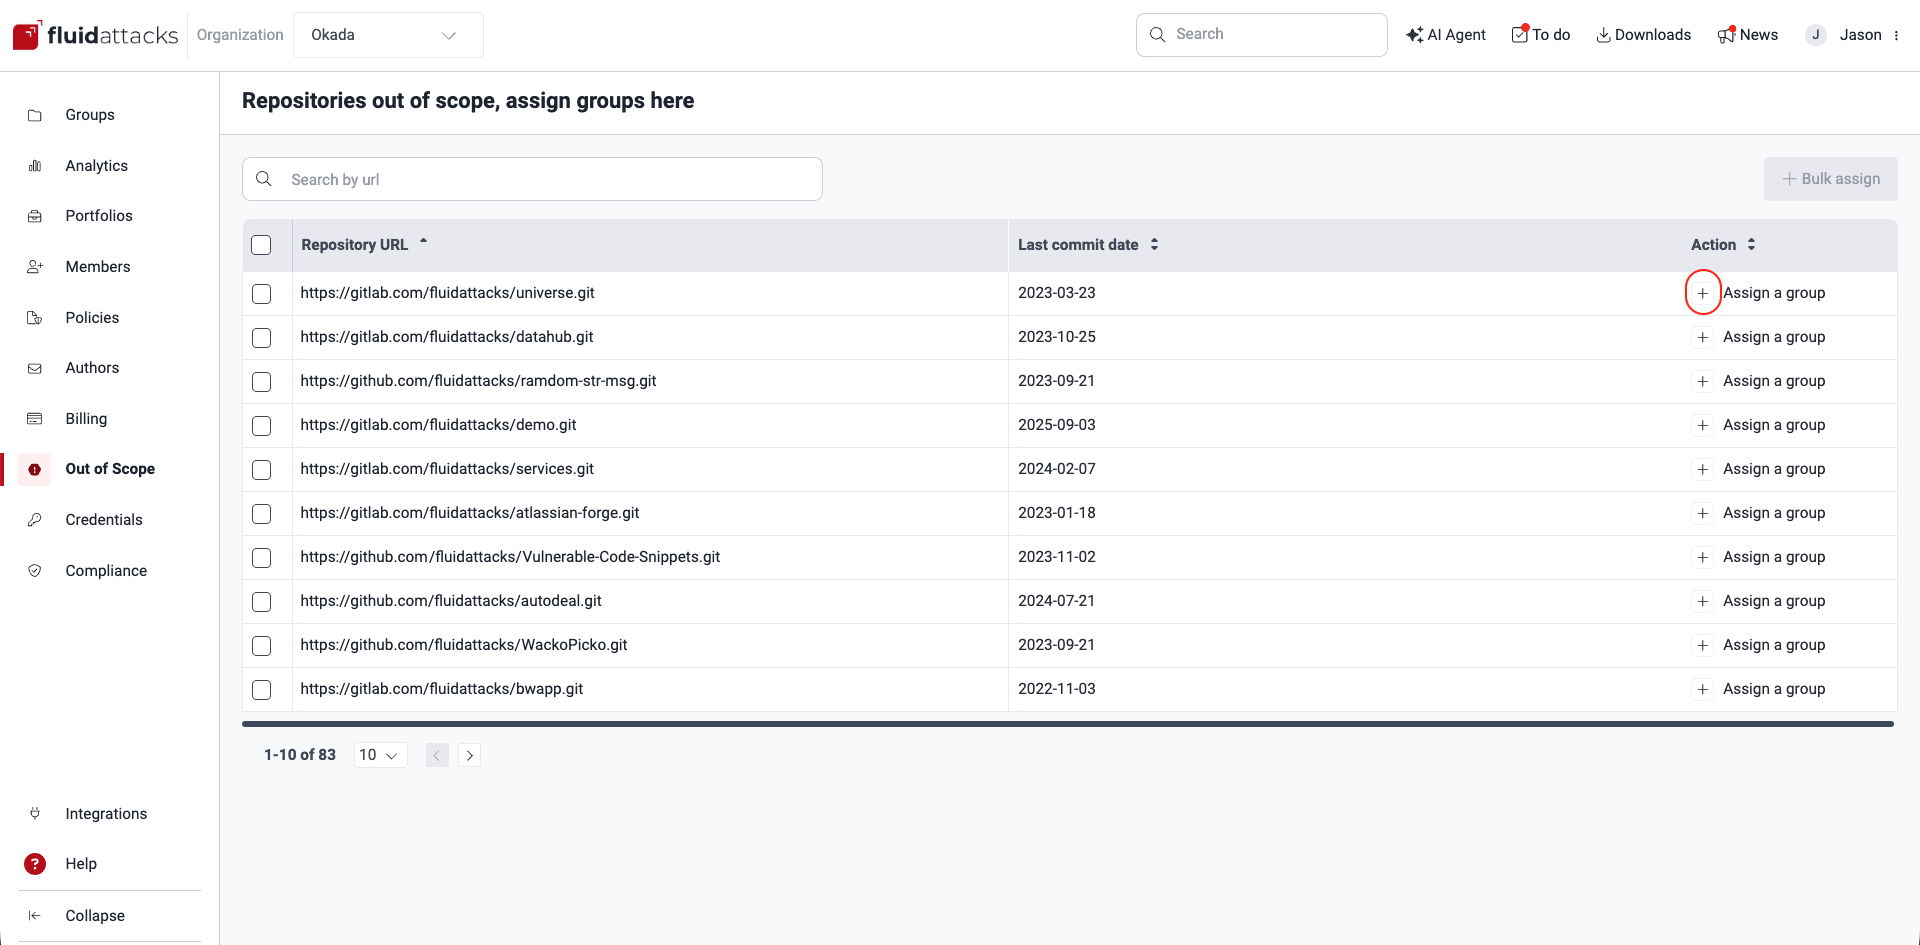
- Go to your organization's Out of Scope section.
- Click the plus symbol in the Action column.
- Specify the group within your organization where you want to add the repository.
- Click Confirm to initiate the import process.
- Provide the required information in the pop-up window and click Confirm when you are done. (Refer to Add a new Git repository manually for explanations of every field if needed.)

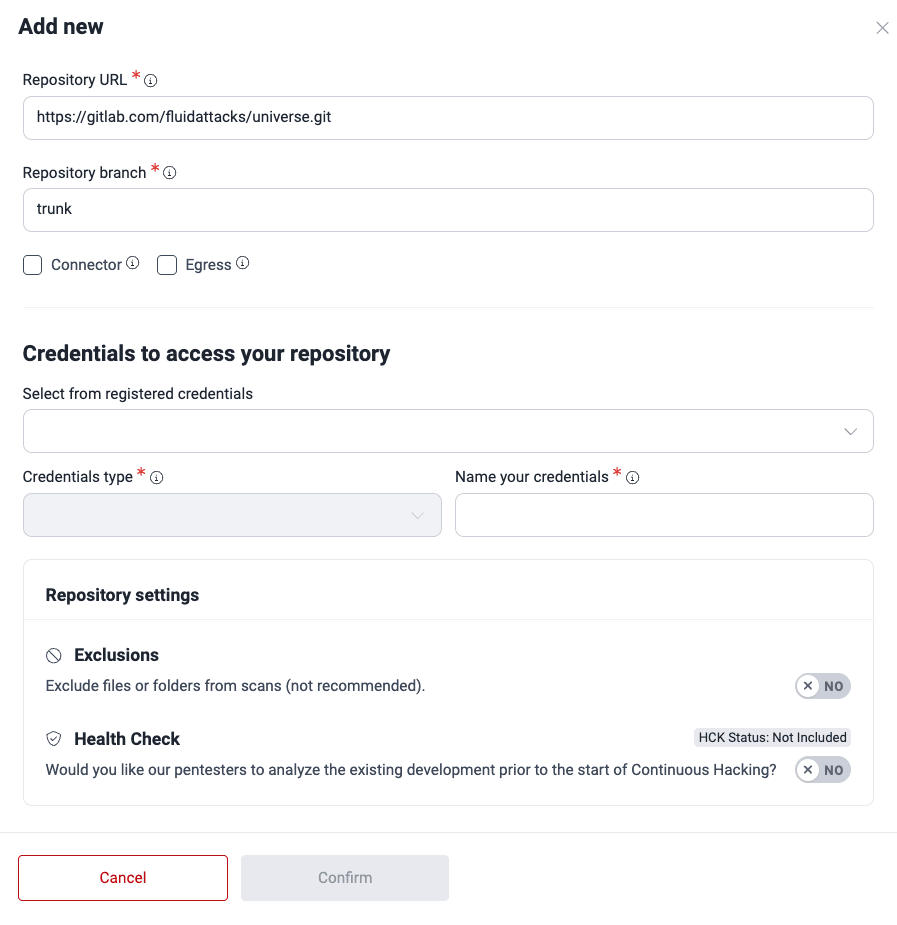
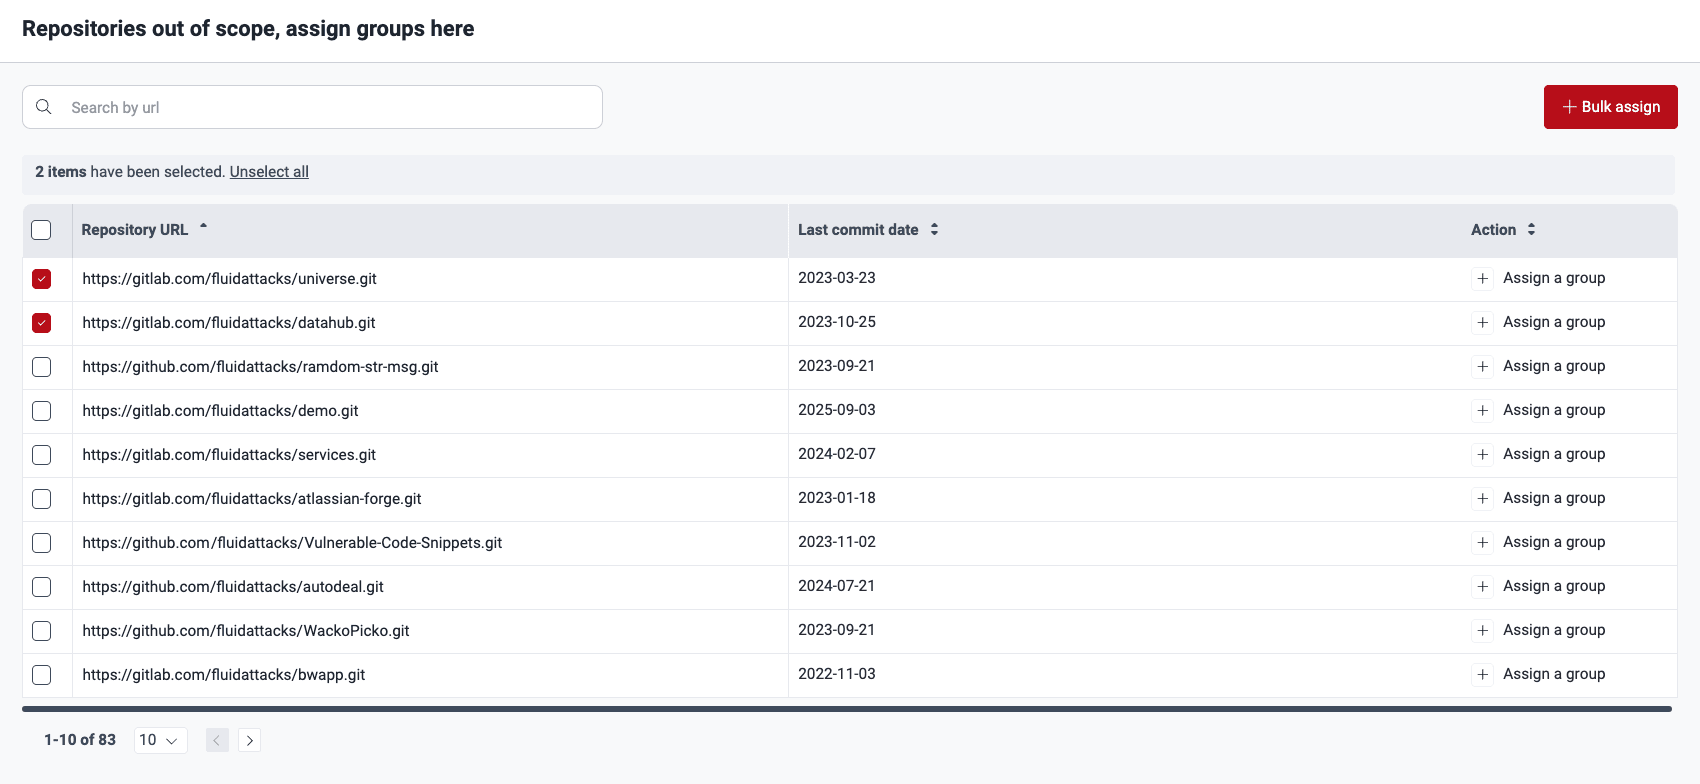
To import multiple repositories, follow these steps:

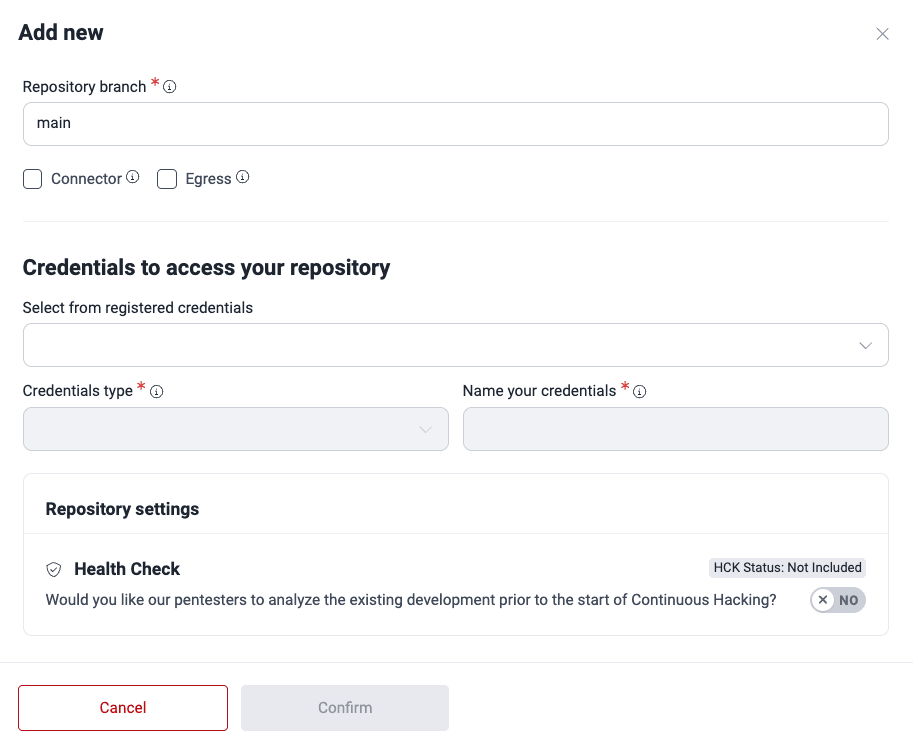
By using this option, you acknowledge that the repos share the same branch, credentials, environment and Health Check configuration.
- In Out of Scope, select the desired repositories using the checkboxes.
- Click the Bulk assign button.
- Choose the group for the selected repositories.
- Provide the required information in the pop-up window and click Confirm when you are done.
Remove OAuth connection
 Role required: Organization Manager
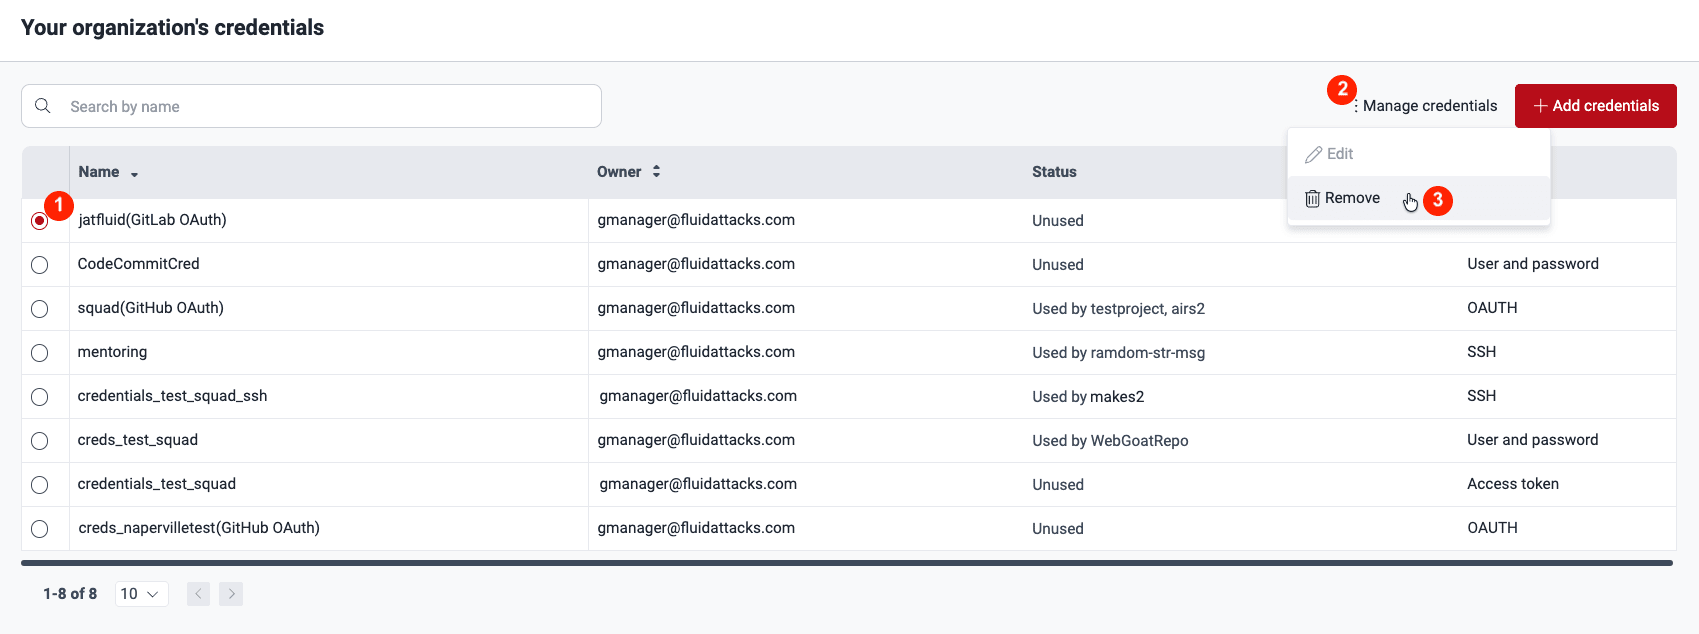
You can remove the OAuth credentials in your organization's Credentials section. Just select the credentials and click on Manage credentials > Remove. The credentials are then removed along with the linked repositories in the Out of Scope section.

Free trial
Search for vulnerabilities in your apps for free with Fluid Attacks' automated security testing! Start your 21-day free trial and discover the benefits of the Continuous Hacking Essential plan. If you prefer the Advanced plan, which includes the expertise of Fluid Attacks' hacking team, fill out this contact form.