Manage repositories
Manage Git repositories
The list and details of Git repositories that are cloned and subsequently analyzed for vulnerabilities is in the Scope section under the title Git Repositories. Within this section, you can add new repositories and perform various actions in relation to listed repos, including editing, enabling or disabling them, exporting repository data, and excluding subpaths from security testing.
Branch testing coverage
- Fluid Attacks' plans include automated testing of as many branches as needed through its scanner's CLI, allowing testing before, during and after the integration of code to a main branch also under testing.
- Fluid Attacks' team of pentesters in the Advanced plan tests manually only one active repository branch per group looking for vulnerabilities in one single version of the system. Testing only one branch allows for better security, as only this way it is guaranteed that contributing developers do not bypass tests and that the system version tested is the one integrated and to be deployed. Moreover, this allows coherent assessments and makes it easier to keep track of findings and fixes. As a result, your development team can efficiently address reported vulnerabilities, while Fluid Attacks' team can effectively verify the successful implementation of your fixes. In conjunction with code branch analysis, Fluid Attacks also manually tests the equivalent environments associated with the provided code branch, ensuring comprehensive security coverage.
About repository cloning
git clone'd) to be subjected to security tests. You can read Fluid Attacks' confidentiality compliance measures to learn how your repository clone is secured. On all active repositories, a scheduled cloning process is performed to ensure the platform always has the up-to-date versions of your repositories (this happens every three hours on working hours, Monday through Friday). You can also trigger a clone process (in case you add new changes you want to analyze) by using the Update button in the Scope section (see below). Further, when you request a reattack in Vulnerabilities, cloning of your repository is performed to ensure analyses on its up-to-date version. If you deactivate a Git repository in the platform, this deletes the clone Fluid Attacks has and stops testing on that repository.Know your Git repositories table

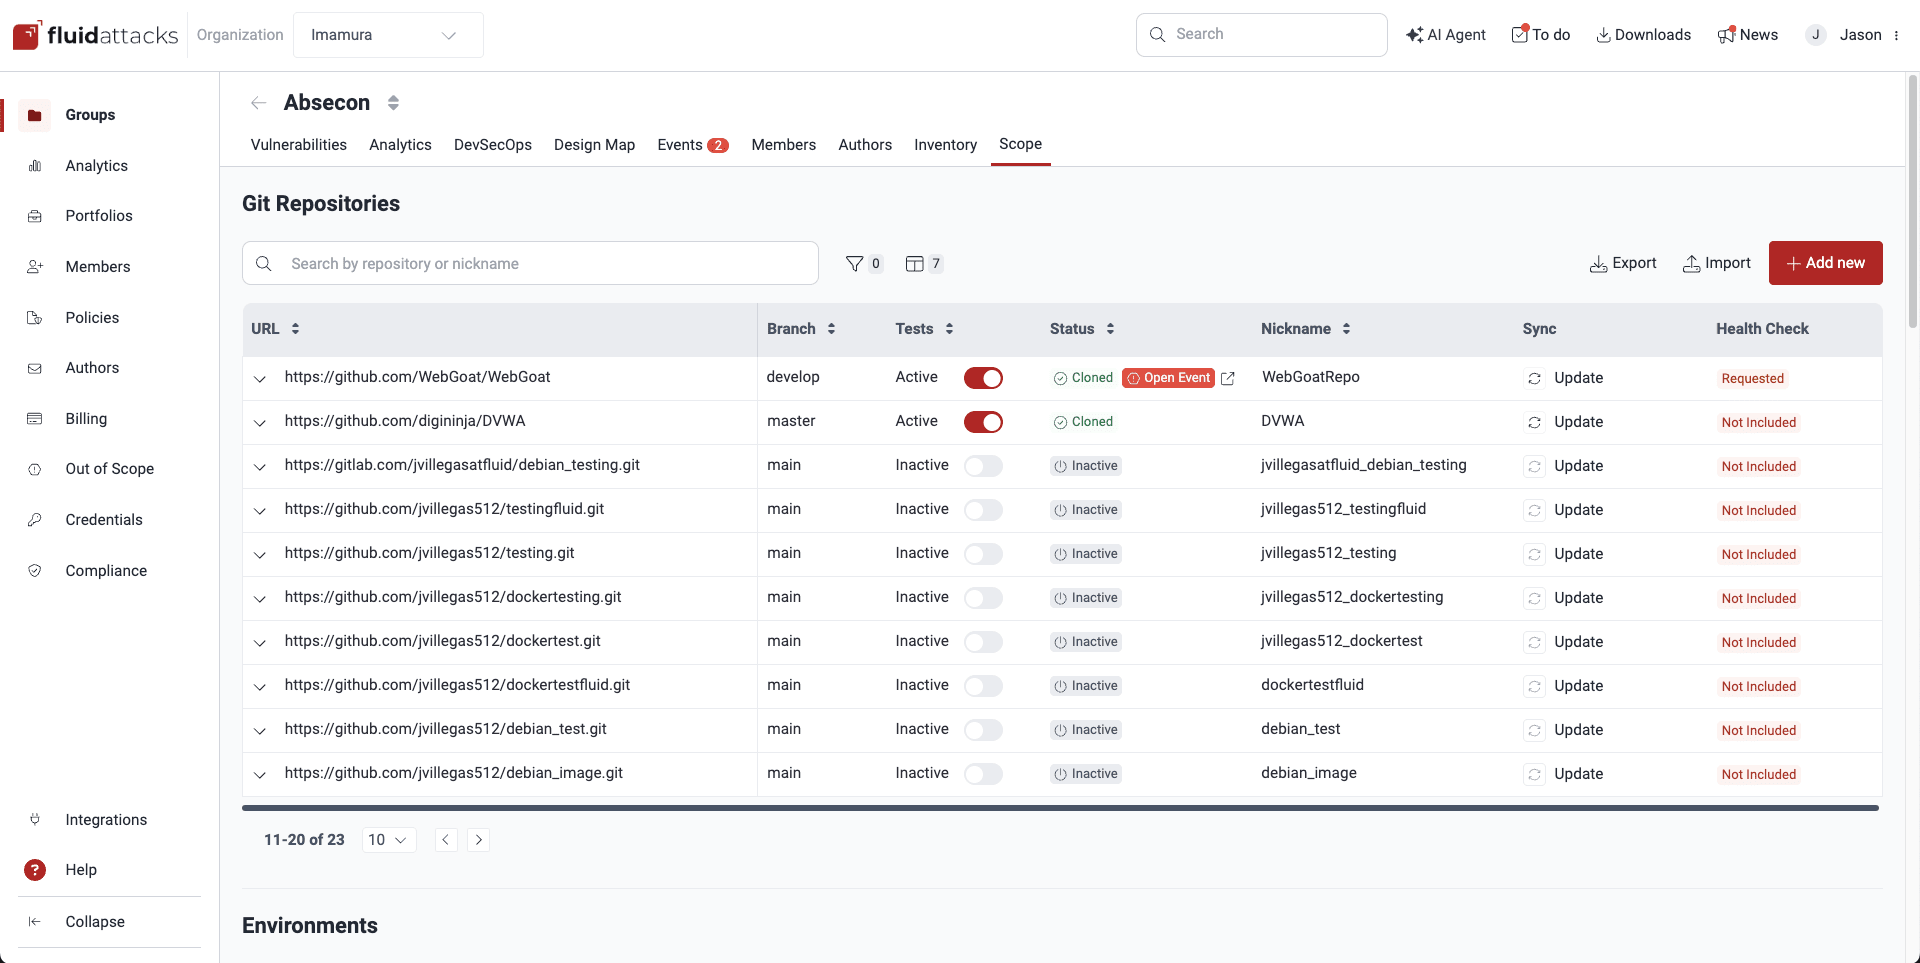
Here is a description of the columns of this table:
- URL: The URL of the repository containing the code that is cloned and tested
- Branch: The specific branch that is tested (Fluid Attacks assesses only one active repository branch per group)
- Tests: Whether the repository is in the scope of security testing, where Active means it is undergoing testing, and Inactive means it is not being tested
- Status: The code repository cloning status, which can be one of the following:
- Cloning: Repository is being cloned
- Cloned: Repository successfully cloned
- Failed: Cloning encountered an error
- Inactive: Repository not cloned, as it is not in the current scope
- Unknown: Initial status before cloning
- Queued: A tool run to check this repo is queued
- Nickname: A name derived from the URL for easy identification of the repository
- Sync: Initiates a request to reclone the repository when changes have been made and, therefore, an updated version is required (while not having requested syncing, repositories are recloned every three hours on working days)
- Health Check: Whether Health Check is included for the repository (only groups in the Advanced plan have this field enabled, as Health Check involves manual security testing); these values are possible:
- Included: Health Check is included
- Not Included: Health Check is not included
- Requested: Health Check has been requested

A downward-facing arrow is present to the left of the URL column. Clicking this arrow expands the row to reveal a description for each repository. You can also use the arrows in rows to expand them individually.

 Note: The nickname is automatically derived from the URL associated with the added repository. Duplicate nicknames are not permitted. If a new repository is being added, and its nickname would be one that already exists, four random characters are appended to the URL-associated nickname.
Add a new Git repository


Add Git repositories using OAuth
OAuth enables a streamlined method for adding repositories from popular providers: Azure, Bitbucket, GitHub, and GitLab.
Once you have created the OAuth credentials on the platform, follow these steps to add a Git repository in the Scope section:
- Click on Add new and select the code repository hosting provider where you have your repository. For this example, GitLab is used as the provider.
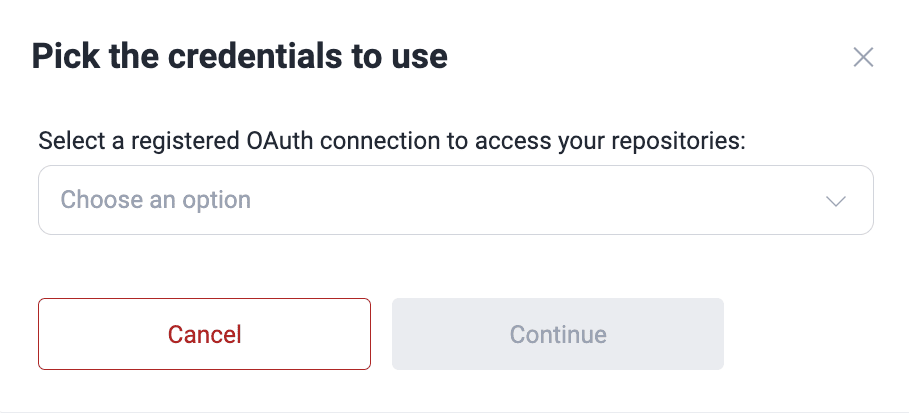
- Upon clicking the provider, a pop-up window prompts you to choose the user credentials corresponding to the OAuth connection for that provider.
- After selecting the credentials, the platform retrieves all relevant data from the associated repositories and their branches. Please note that the loading time may vary depending on the volume of data. Once the data is loaded, the Continue button becomes active. Click it to proceed.
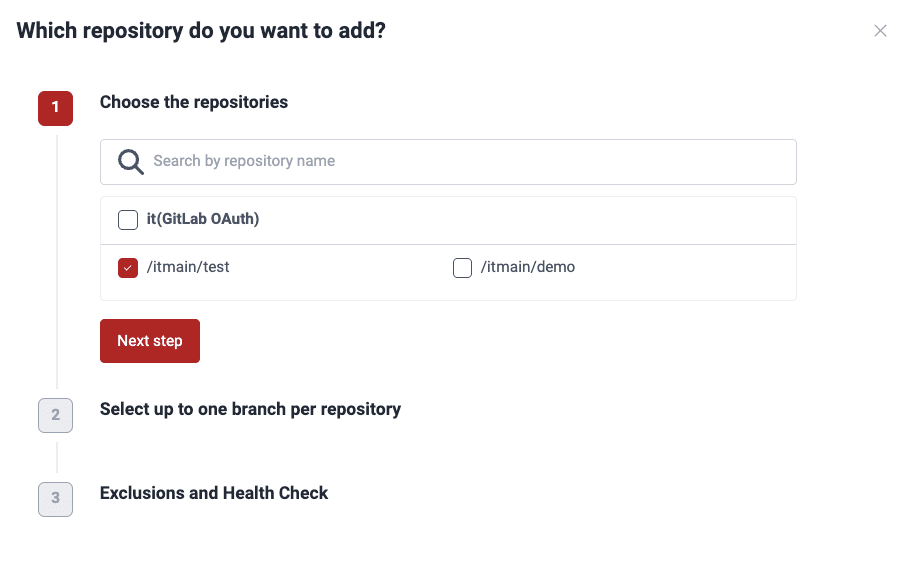
- You are presented with a three-step form. First, choose the repository or repositories you wish to add and click on Next step.
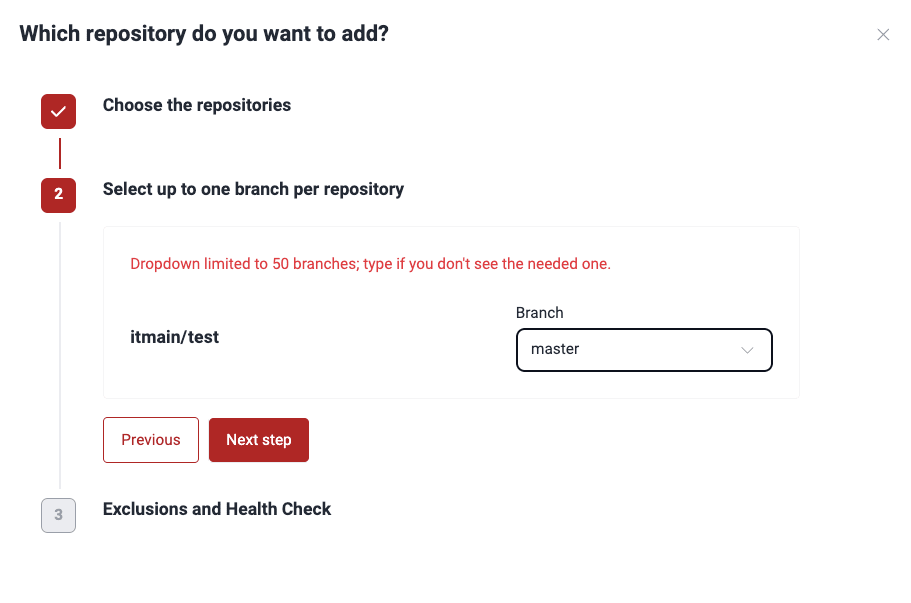
- Select a specific branch of each repository to test. Confirm your choice by clicking Next step.
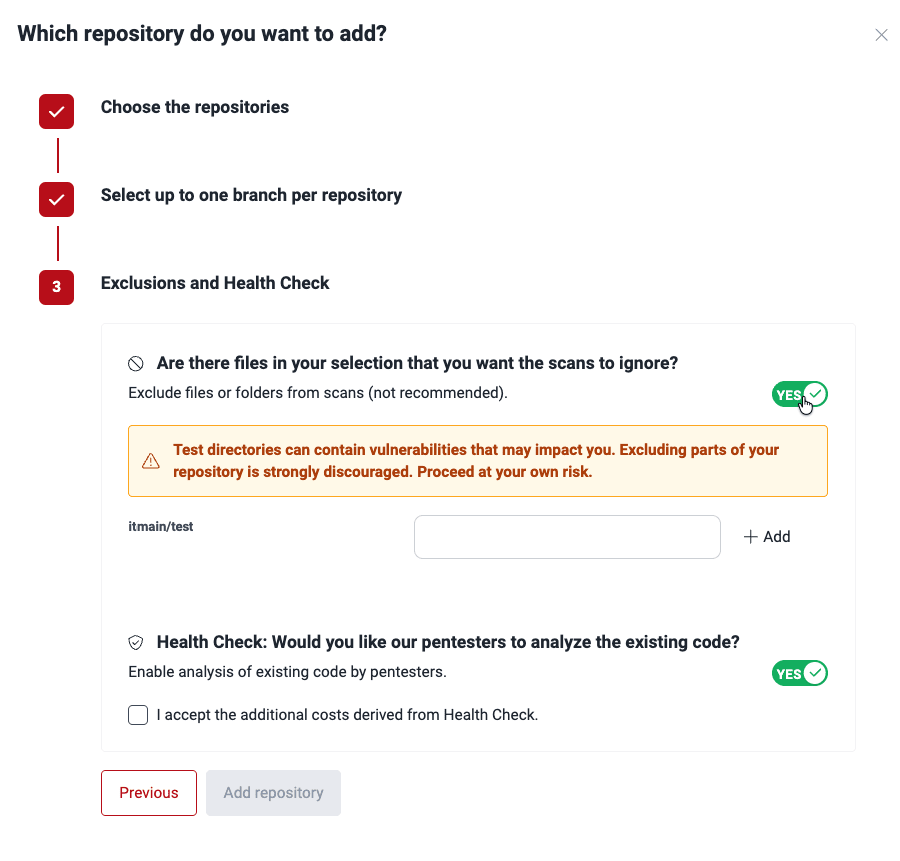
- Specify whether you wish to exclude files from security testing. If you choose Yes, you are asked to provide the paths of specific files or folders to exclude. (You may also exclude files elsewhere, using exclusions as code.)
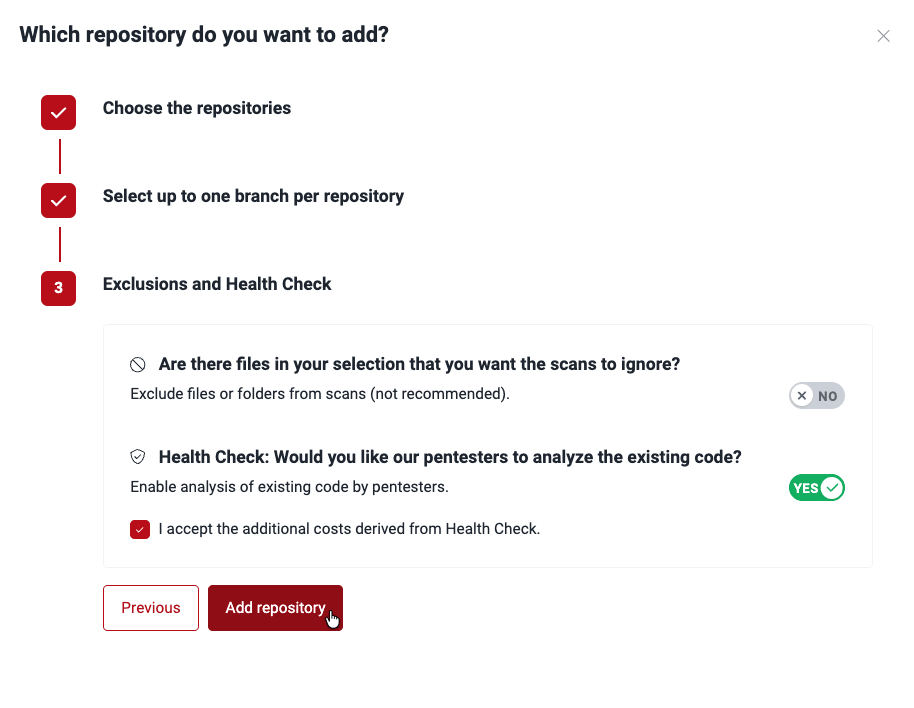
- Click the Add repository button to add the Git repository or repositories.



Add a new Git repository manually
To add a new Git repository manually inputting the repository details, follow these steps:
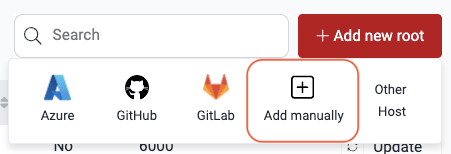
- Click on Add new and choose Add manually.
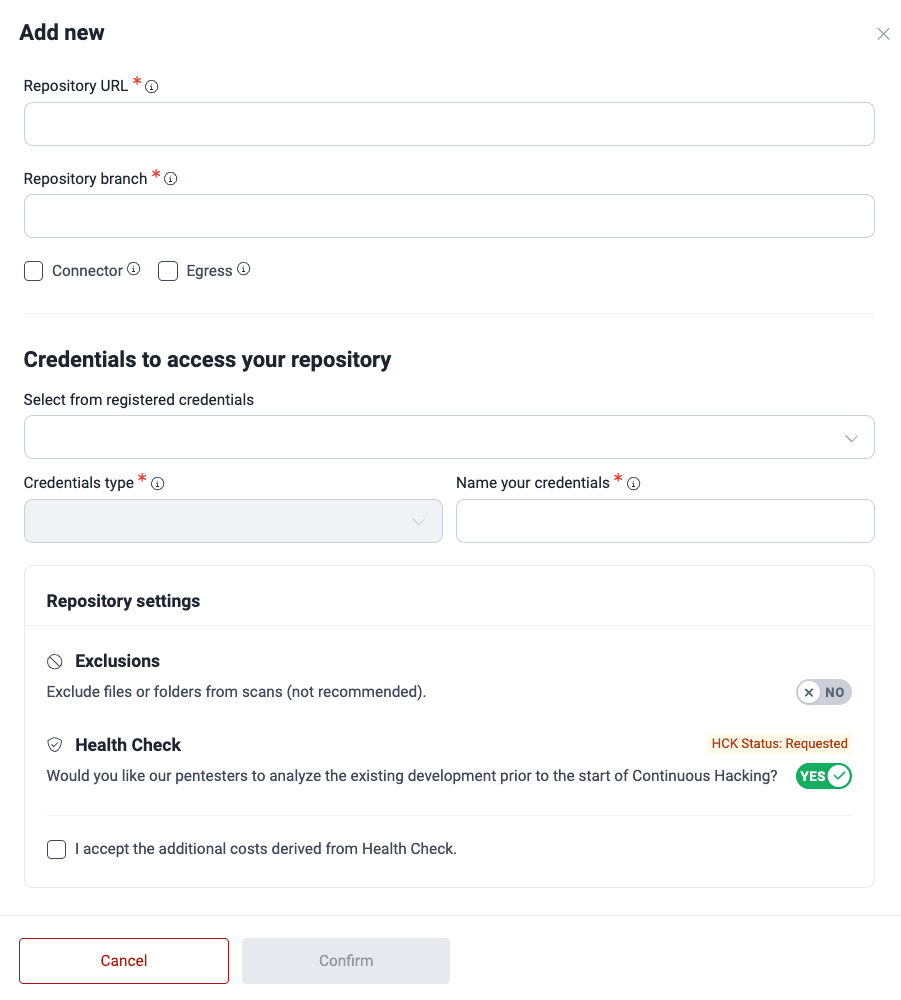
- You are presented with a form where you need to provide the following information for the repository:
- Repository URL: The URL where the repository is located
- Repository branch: The specific branch within the repository to be tested
- Connector: Whether the repository is behind a private network and Cloudflare Tunnel is configured
- Egress: Whether the repository is behind a private network and specific IPs need to be whitelisted on your firewall
- Existing credentials: If applicable, choose the previously created credentials to access the repository
- Credential type: The authentication method to be used, identified automatically from the URL:
- User and password: The traditional login method using your username and password combination
- SSH: A secure key-based authentication method for accessing remote systems, offering enhanced security compared to passwords
- Access token: A Personal Access Token for authorizing Fluid Attacks with Azure DevOps.
- AWSROLE: Allows Fluid Attacks to assume an Identity and Access Management (IAM) role in your AWS account
- OAUTH: Allows Fluid Attacks to access your repositories on supported platforms (Azure, Bitbucket, GitHub, and GitLab)
- Name your credentials: A name to easily identify the credentials
- Exclusions: Whether some files or folders should be excluded from security testing, and, if so, their paths (exclusions can also be indicated with code; this field is only available for Group Managers)
- Health Check: Whether you wish Health Check to be performed (i.e., having Fluid Attacks' pentesters manually test existing code)
- Click on Confirm to add the repository.

Existing credentials
Fluid Attacks needs credentials to access the repositories to test. During the process of adding or editing a repository, you encounter the field Select an existing repository credential. Clicking on the dropdown menu reveals a list of credentials that have been either used for adding Git repos in the past or previously added on their own in the Credentials section. In any case, they are stored for use across the groups within the organization.
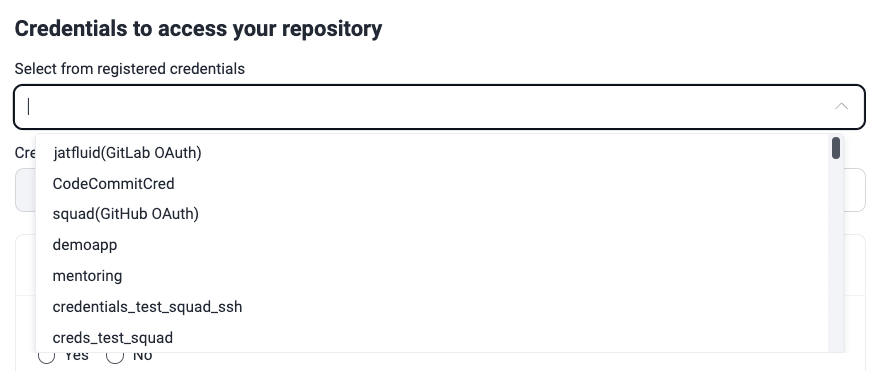
If any of the listed credentials are suitable for the repository you are adding or editing, select it. This automatically fills out the Credential type and Name your credential fields.

Credential type
To add a Git repository within the Scope section, you can provide any of the following authentication methods: user and password, SSH key, Azure Personal Access Token, and cross-account AWS IAM role. The platform identifies the credentials type based on the repository URL you provide.
Add a repository with user and password
HTTPS authentication allows you to access the repository by supplying a username and password pair. When you fill out all the fields related to credentials, a button saying Check access appears. Clicking it tells the platform to validate the correctness of the provided access credentials for successful repository cloning. It is advisable to check access and proceed with adding the repository only if the message "Success - Access checked!" appears.
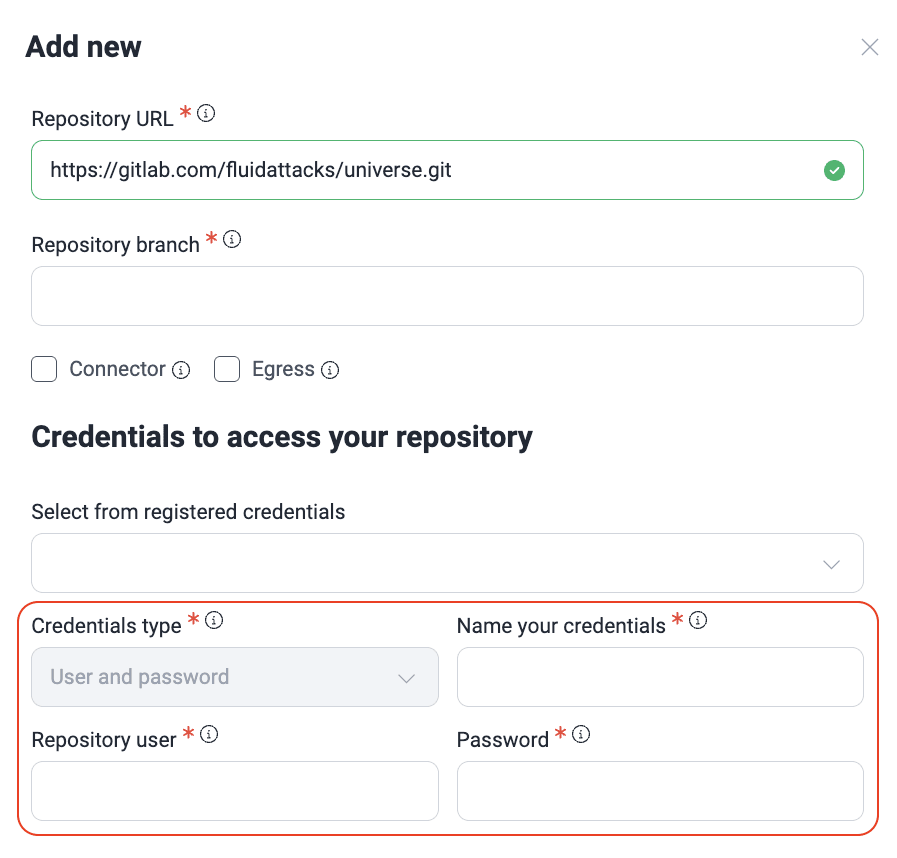
 Note: When providing the username and password for a GitHub repository, you must replace the password with a personal token. Refer to the official GitHub documentation for guidance on generating this token.
Add a repository with an SSH key
SSH keys establish a connection to your repository server without the need for a username and password. When you choose this credential type when adding or editing a Git repository, you are required to provide a private key.
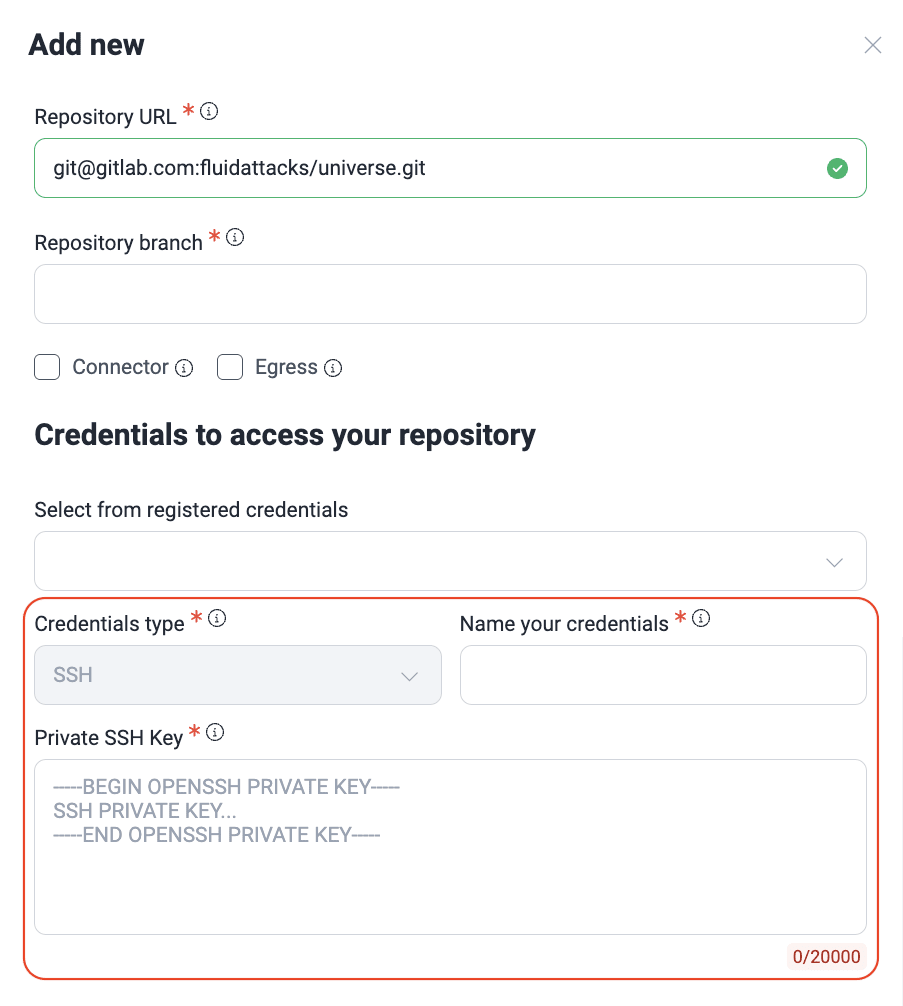
 Note: For instructions on how to set up SSH keys, refer to your code repository hosting provider's official documentation. See, for instance, GitHub's and GitLab's pages.
Add a repository with an Azure DevOps PAT
To securely connect Fluid Attacks to your Azure DevOps repositories, you need to use a Personal Access Token (PAT). This acts as a unique password, granting specific access rights without sharing your primary account credentials. After generating a PAT with the necessary permissions within Azure DevOps, you can enter it here to enable Fluid Attacks to clone and evaluate your repository.
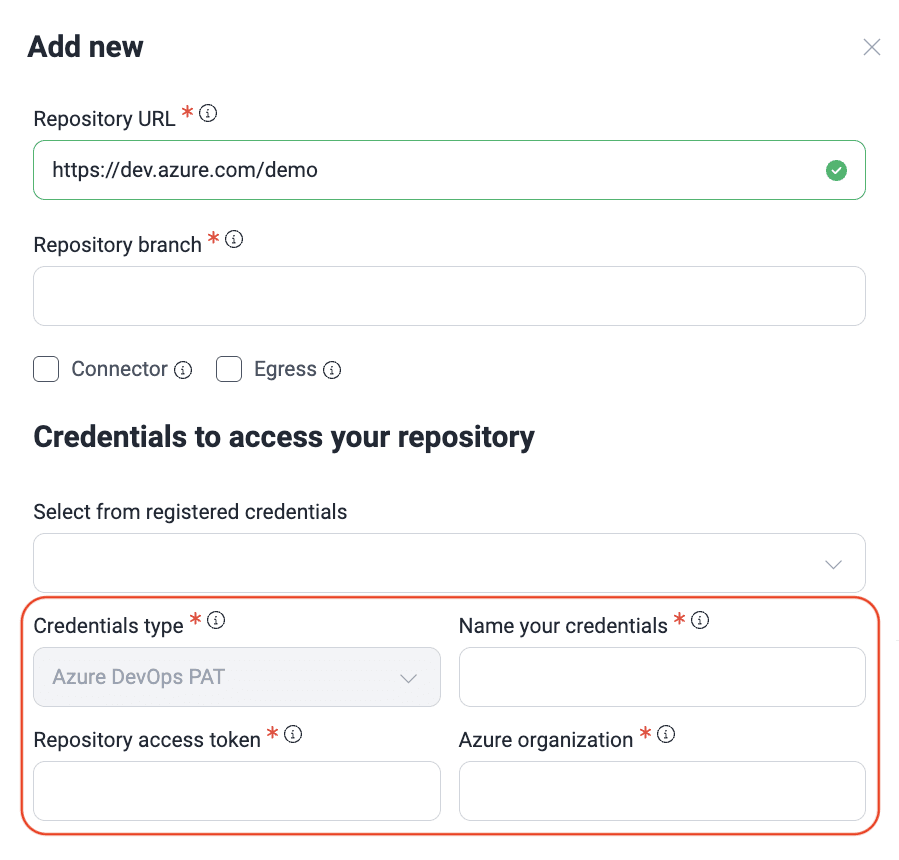

Add a repository with a cross-account IAM role
To seamlessly integrate Fluid Attacks with your AWS environment across multiple accounts, you can leverage a cross-account Identity and Access Management ( IAM) role. This allows you to establish a role in one AWS account that securely delegates specific permissions to another AWS account, enabling Fluid Attacks to access and assess your resources without requiring direct credentials. Fluid Attacks has published the instructions to create an IAM role in Set up an AWS integration.
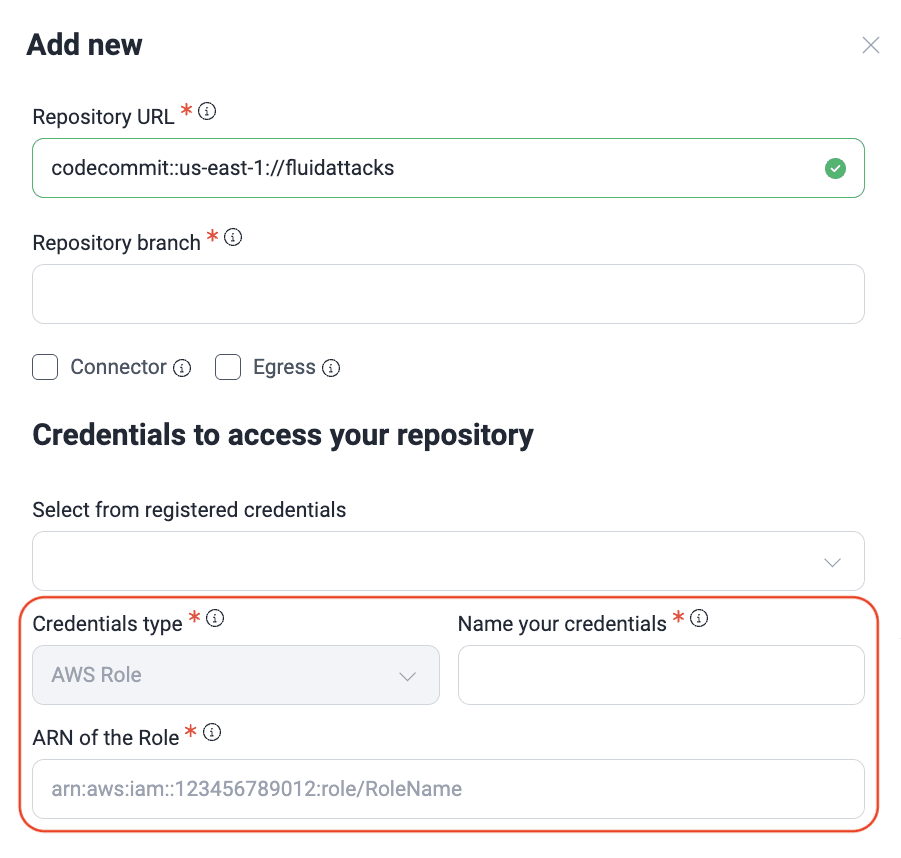
 Note: For information on cross-account resource access, read the official AWS documentation.
Exclude subpaths in Git repositories

 Note: There is no restriction on the number of exclusions you can define. Tailor the exclusions to your specific requirements.
- Access the Scope section of your group.
- If your intention is to add a Git repository and define the files or entire folders to exclude, click on Add new. But if you wish to define exclusions from a previously added repository, click on its URL.
- In the pop-up window, scroll down to Exclusions.
- Switch the answer to Yes. A field then appears where you can enter the pattern for the file or folder you wish to exclude. You can keep adding exclusions using the Add another option, or delete them clicking on the corresponding trash can icon.
- Click on Confirm to apply the exclusions.


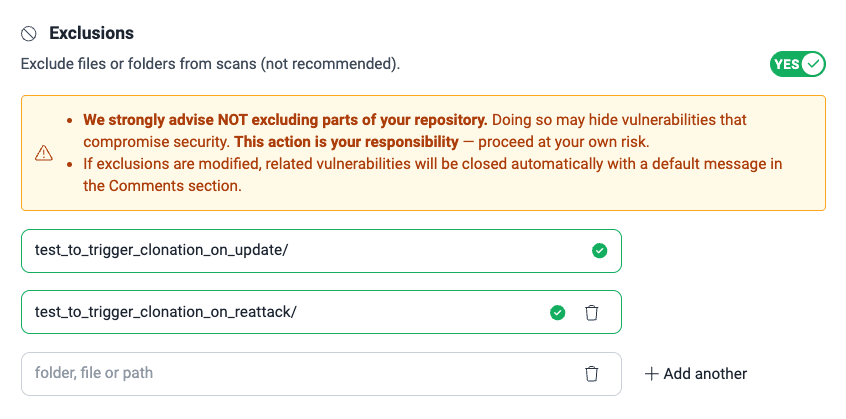
 It is advisable to know about pattern usage and exclusion best practices beforehand. Click the question mark icon next to "Specify the folders, files or paths to be excluded" to access reference documentation.

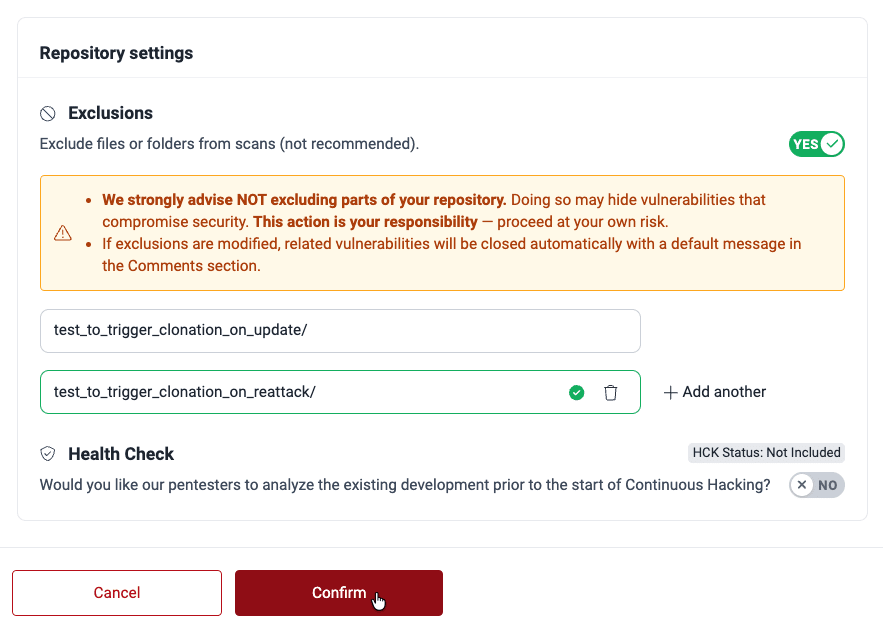
 Note: If you exclude files or folders with unmanaged vulnerabilities, please be aware that the Status of those findings does not appear as 'Closed' immediately. You must wait for the next scheduled tool run or request a manual reattack in which Fluid Attacks' tool or pentesters update the Status.
Exclusion examples
-
node_modules/ build/tmp/test/*.js(exercise caution when using wildcards)repo-root/dummy/excludeme.js

Set exclusions as code
Fluid Attacks' scanner recognizes exclusions specified directly within your application's source code. One way is adding NOFLUID and an explanation as comment before insecure code. Another way is having exclusions specified in a .fluidattacks.yaml file at the root of the project. Read the details in Exclude findings from scan reports.
Import repositories through a CSV file
 Role required: User or Group Manager
Prepare the CSV file
Ensure your CSV file adheres to the following header format with eight columns.


| Column name |
Mandatory in file
|
Description
|
Example
|
url |
Yes
|
The URL of the repository containing the code to be cloned (include the protocol prefix, i.e., https:// or ssh://)
|
ssh://git@gitlab.com:user/example-repo.git |
branch |
Yes
|
main |
|
includes_health_check |
Yes
|
Indicates whether Health Check is requested for the repository (can be
true or false) |
true |
git_ignore |
Yes (can be left empty)
|
The paths within the repository that you want to exclude from testing. If excluding multiple paths, separate them using semicolons (;). For comprehensive evaluations, you are advised to leave this field empty.
|
test_data/ ;mocks/files/ |
credential_id |
Yes
|
The unique identifier for the credentials used to access the repository, which you can obtain by querying the Fluid Attacks API, as shown below this table, after registering your credentials.
|
4f48f4d2-8478-4a33-a2d3-fac8e03d9cfc |
connection |
No
|
The type of connection to your assets. You can set it to
egress or ztna or leave it blank for no custom connection; get more information in Access to your assets. |
ztna |
nickname |
No (defaults to the repository name if left blank)
|
The custom nickname for your repo. You can define it using alphanumeric and some special characters (
:_.) but not exceeding 128 characters, or leave it blank. The nickname must be unique in your organization. |
my_repo_1 |
  query MyQuery {
          organizationId(organizationName: "org_name") {
           credentials {
            id
            name
type
}
}
}
Below is an example where you can see the ID within the result.
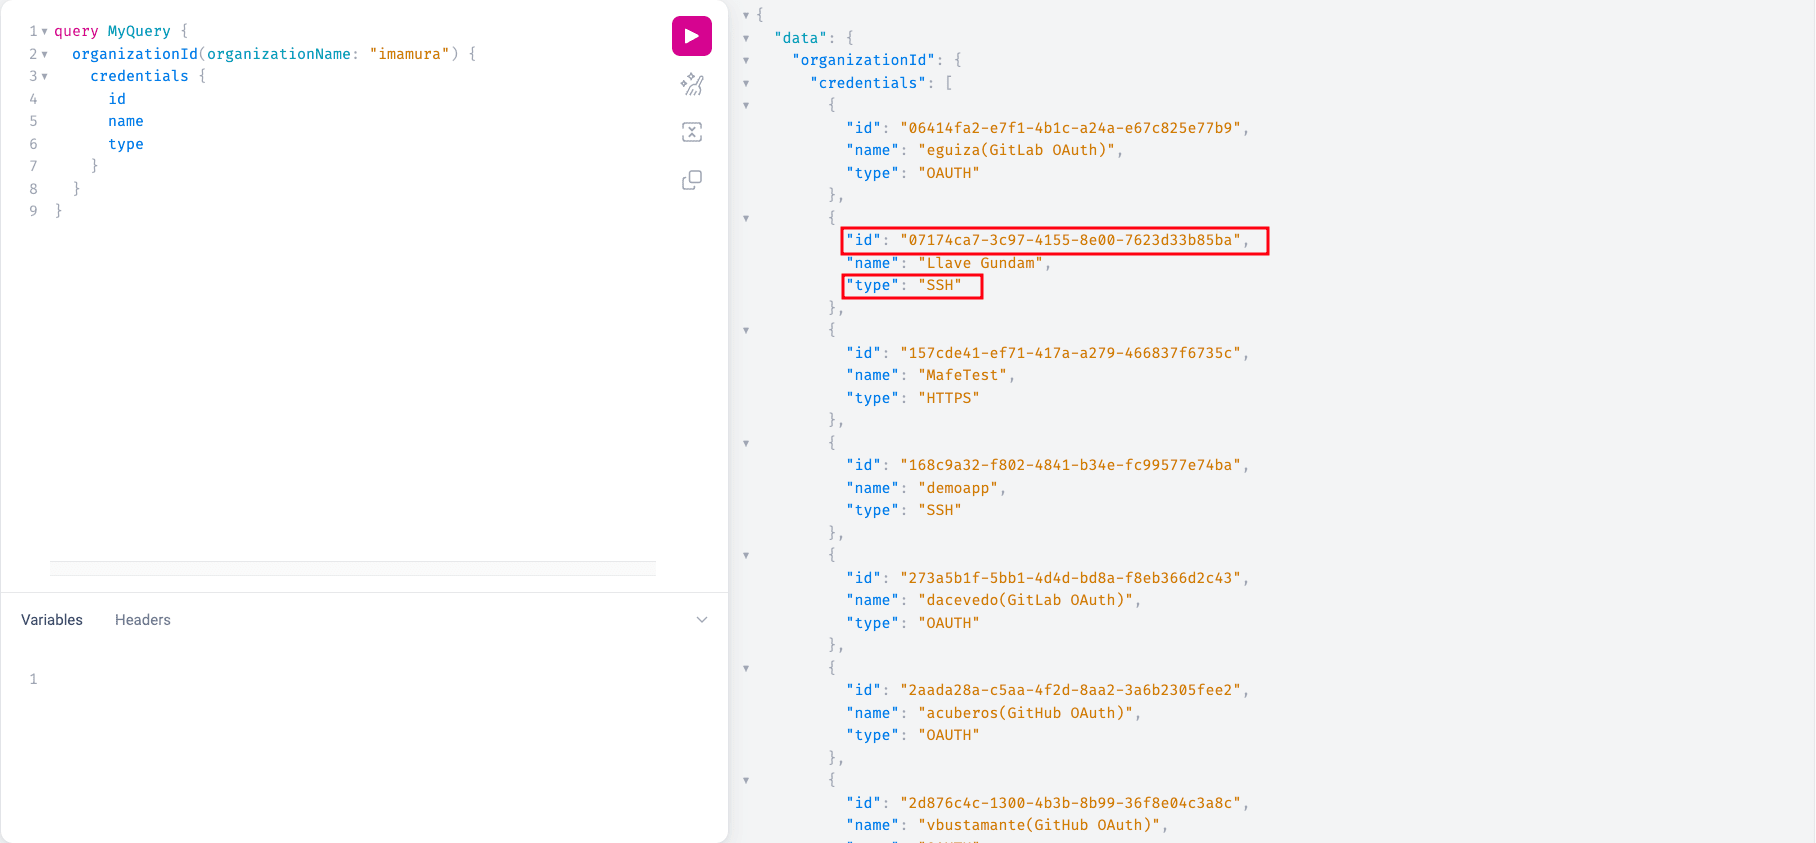

Import the CSV file
- Go to the Scope section and click on the Import button.
- Click on Add file.
- Select the CSV file and click on Upload.

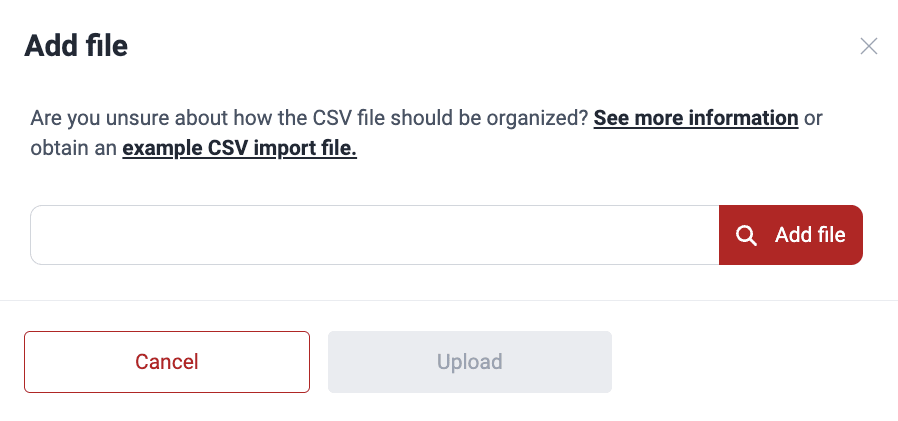

After clicking on Upload, you receive a confirmation message, and the added Git repositories are visible on the table and start being cloned on the platform.

CSV file checks
When you upload a CSV file to import multiple repositories, it goes through the following checks:
- Invalid URL or branch: Ensures the provided URL and branch are valid and correctly formatted
- Prevention of CSV injection: Safeguards against malicious code injection attempts through the CSV file
- Incorrect characters: Verifies that fields do not contain invalid characters
- Credentials ID validation: Confirms the validity of the specified credentials ID
- Avoiding duplicates: Prevents duplicate entries within the CSV file (same URL and branch)
- Avoiding Root Duplicates: Prevents the import of repositories that already exist on the platform
Export Git repositories table


- Id: Unique identifier of the repository
- State: Indicates whether the repository is currently active
- Cloning message: Additional information about the cloning process or its outcome
- Use egress: Indicates if Cloudflare Egress IPs are required for cloning
- Use vpn: Indicates if the Legacy VPN is required for cloning
- Use ztna: Indicates if Cloudflare ZTNA is required for cloning
- Repo creation date: Timestamp when the repository was added to the platform
- Added by (mail): Email of the user who originally added the repository
- Last edited by (mail): Email of the user who last modified the repository prior to export
- Date last edited: Timestamp of the most recent modification before export
- Credentials Id: Identifier(s) of the credentials used for cloning
- Credentials name: Name assigned to those credentials
- Credentials type: Credential method used (e.g., HTTPS, OAUTH, AWSROLE)
- Gitignore: Repository paths excluded from assessments
- Environments: URLs for accessing associated environments
- Excluded environments: Environment URLs excluded from assessments
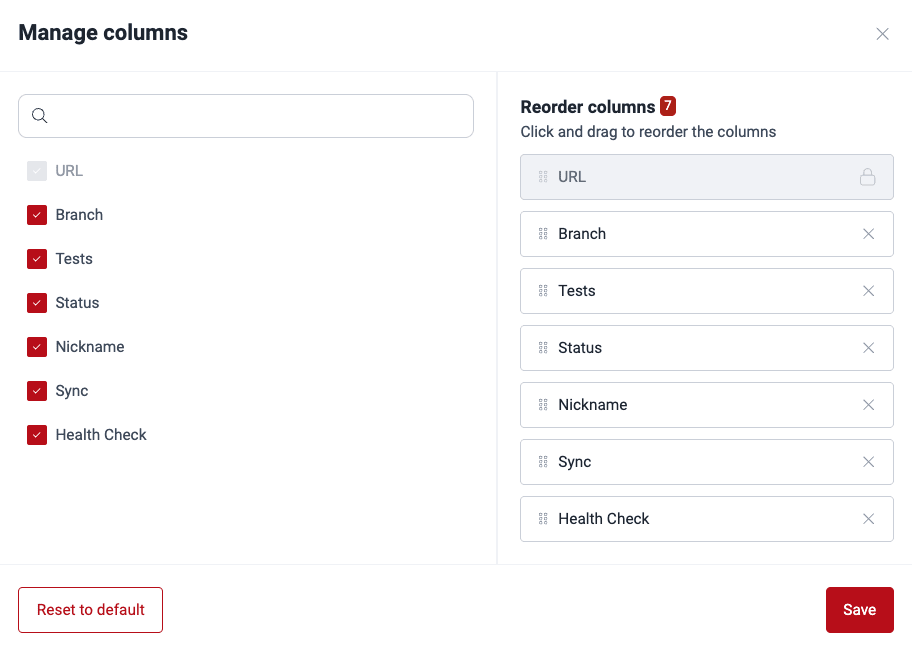
Show or hide columns of the Git repositories table

Filter the Git repositories table

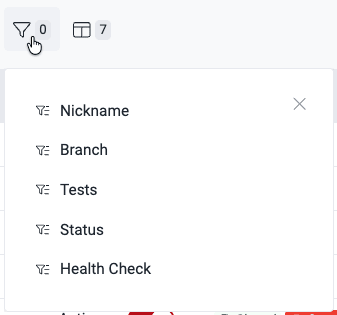
Find filter options

Choose filters to apply
Edit a Git repository


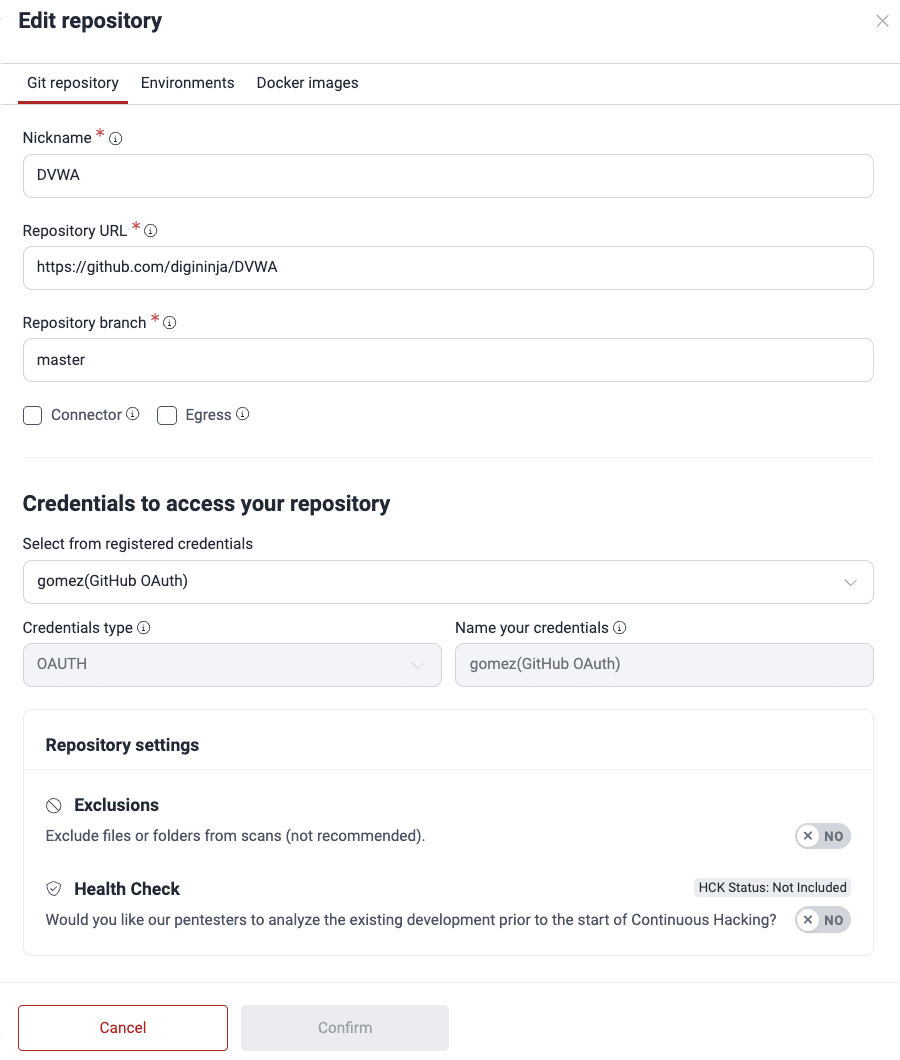
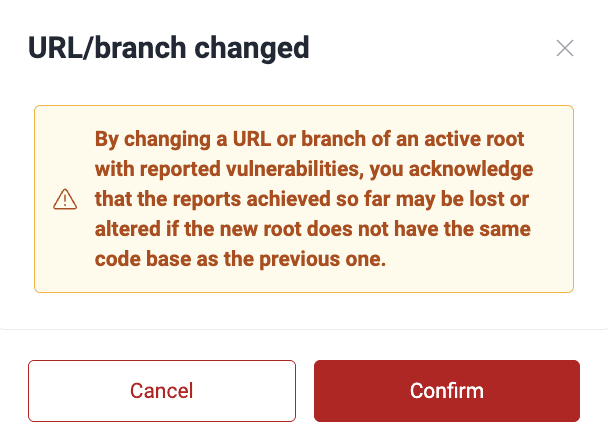
- In the Scope section, locate the active Git repository you wish to edit and click on its URL.
- The pop-up window presents three tabs for navigation: Git repository, Environments, and Docker images. Adjust the details as necessary in the Git repository tab.
- Click on Confirm to apply the changes.


Deactivate a Git repository
 Role required: Group Manager
To keep a repository within the scope of security testing or leave it out, you may change its Tests value. The latter, shown in the Scope section, can be set to Active or Inactive:
- Active: The repository is cloned and accessible for analysis by Fluid Attacks' AppSec testing tool and pentesters
- Inactive: The repository was added to the scope by mistake, does not exist anymore, or its location was changed, therefore Fluid Attacks does not clone it nor test it
You have the flexibility to modify the Tests configuration at any time. A detailed change history is maintained for traceability. Moreover, Tests changes trigger email notifications to all project stakeholders subscribed to them, both within Fluid Attacks and the customer's organization.
- Go to the group's Scope section to locate the repository you wish to deactivate.
- In the Tests column, switch the toggle to off. (If this column is not showing, try seeing whether it is hidden using the Columns option.)
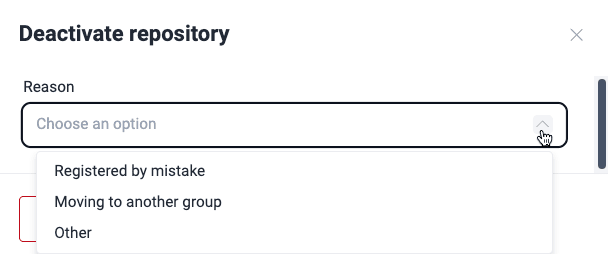
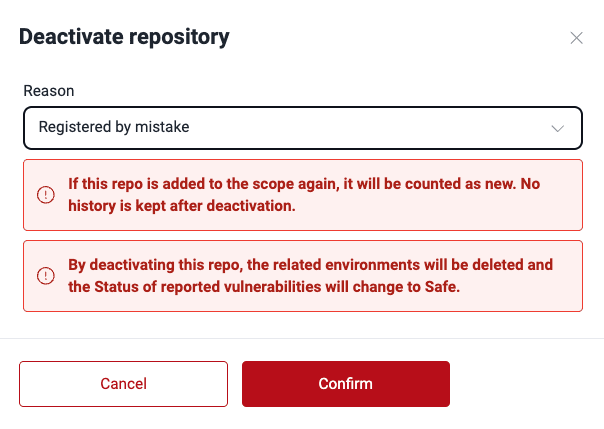
- A pop-up window prompts you to specify the reason for deactivation.
- Registered by mistake: You or your team had mistakenly added this repo or made mistakes filling out its details (if you simply need to update the URL, branch, or other attributes of a Git repo, consider editing instead of deactivating it).
- Moving to another group: You wish to transfer the repo, along with its associated vulnerability report, to a different group. After choosing this option, use the search bar to find the target group within your organization, which must be under the same subscription as the currently opened.
- Other: If neither of the above reasons applies, use this option to provide your explanation for deactivation.
- Click on Confirm to apply the deactivation.


Manage IP Roots
An IP address serves as a unique identifier for a device connected to the Internet or a local network. If your group is subscribed to black-box testing, i.e., security testing without access to source code, you can manage IP roots in the Scope section. By providing Fluid Attacks with an IP address, you enable Continuous Hacking to evaluate the security posture of all web applications reachable through that specific target.
Know your IP roots table


These are the descriptions of each column:
- Address: The specific IP address under evaluation
- Nickname: A user-defined name for easy identification of the IP root
- State: Whether the root is in the scope of security testing, where Active means it is undergoing testing, and Inactive means it is not being tested
Add an IP root

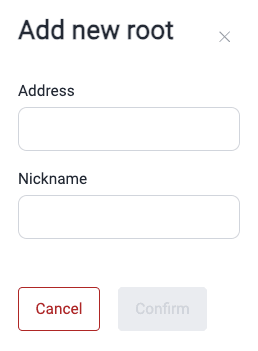
- Go to the Scope section of the group where you wish to add an IP address to test.
- Click on Add new root under IP Roots.
- Provide the address and define its nickname.
- Click on Confirm.
Edit an IP Root

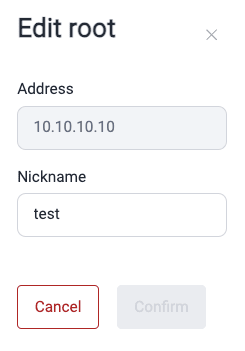
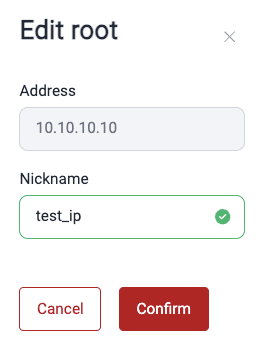
- Go to your group's Scope section.
- Click on the IP root you wish to edit.
- In the pop-up window, change the nickname as desired.
- Click Confirm.


Deactivate an IP Root

Manage URL Roots
URL roots represent dynamic environments already deployed on a web server. Adding them to Fluid Attacks' scope allows for direct assessment of your live web applications without access to source code. This is available to groups subscribed to black-box testing.
Know your URL Roots table

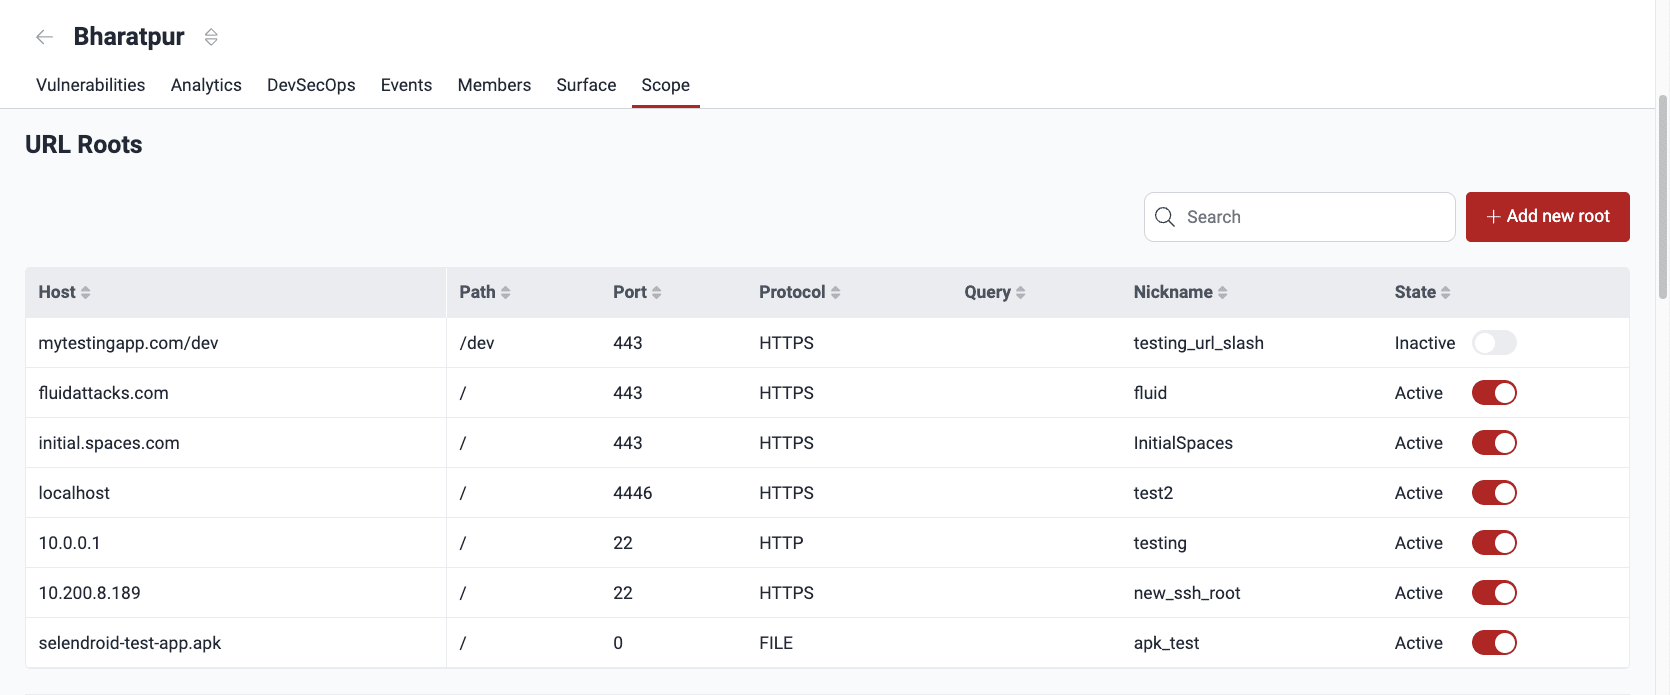
- Host: The domain name or IP address of the web server
- Path: The specific path within the URL to be assessed
- Port: The port number used to access the URL
- Protocol: The protocol used by the browser (e.g., HTTP or HTTPS)
- Query: Any query parameters included in the URL
- Nickname: A user-defined name for easy identification
- State: Whether the root is in the scope of security testing, where Active means it is undergoing testing, and Inactive means it is not being tested
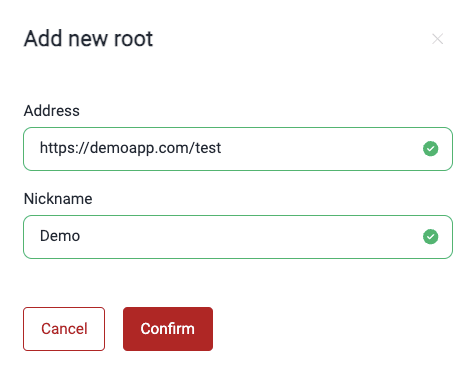
Add a URL root

- Go to the Scope section of the group where you wish to add the URL root.
- Under URL roots, click on the Add new root button.
- Provide the complete URL of the deployed environment you want to assess and a nickname for it.
- Click on Confirm.
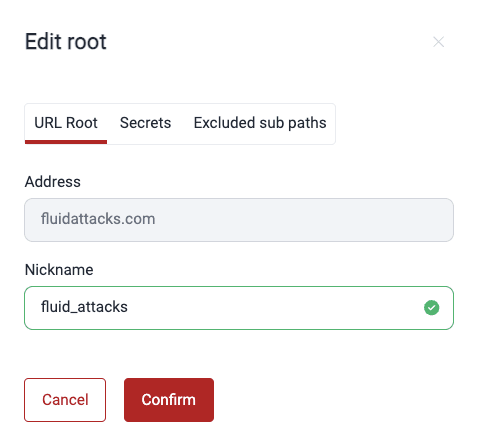
Edit a URL Root

- Go to your group's Scope section.
- Click on the URL root you wish to edit.
- In the pop-up window, change the nickname as desired.
- Click Confirm.


Deactivate a URL Root

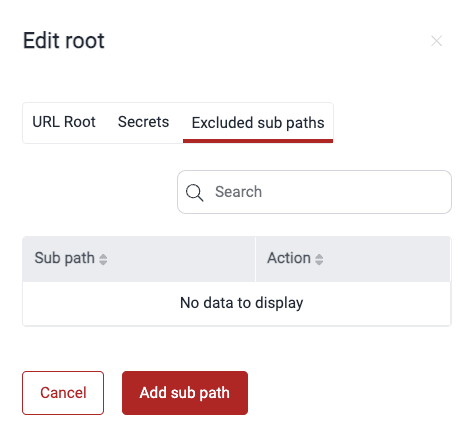
Exclude subpaths in URL Roots

 Please note that excluding subpaths means they are not considered in vulnerability analysis.
- Go to the group's Scope section.
- Click on the host of the URL root containing the subpath you want to exclude.
- In the pop-up window, switch to the Excluded sub paths tab.
- Click the Add sub path button.
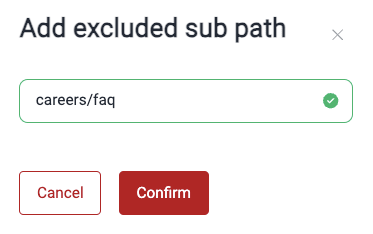
- Enter the subpath you wish to exclude.
- Click Confirm.

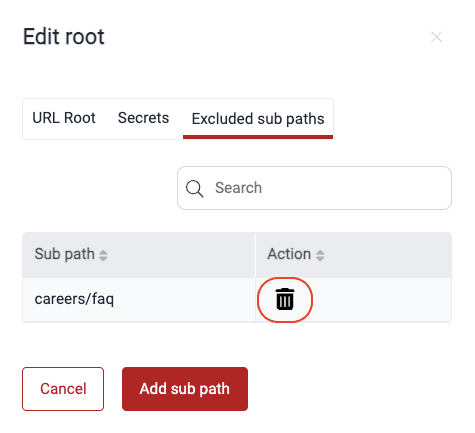
To reinclude the subpath to the testing scope, follow these steps:
- Click on the host of the URL root.
- Go to the Excluded sub paths tab.
- Click on the trash can icon corresponding to the subpath you want to reinclude.
