Set up the Azure DevOps integration
 Fluid Attacks' Azure DevOps integration, along with our entire suite of local tools and extensions, is available free of charge.
Follow these steps to set up Fluid Attacks' integration with Azure DevOps:
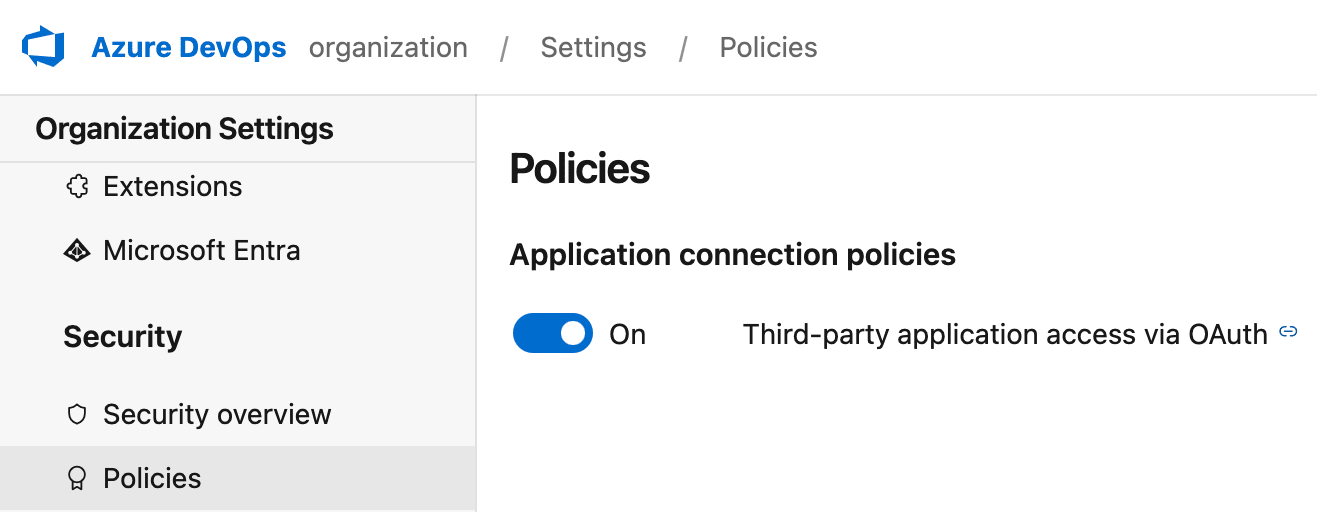
- Go to your Azure DevOps Organization Settings and ensure it allows third-party application access via OAuth.
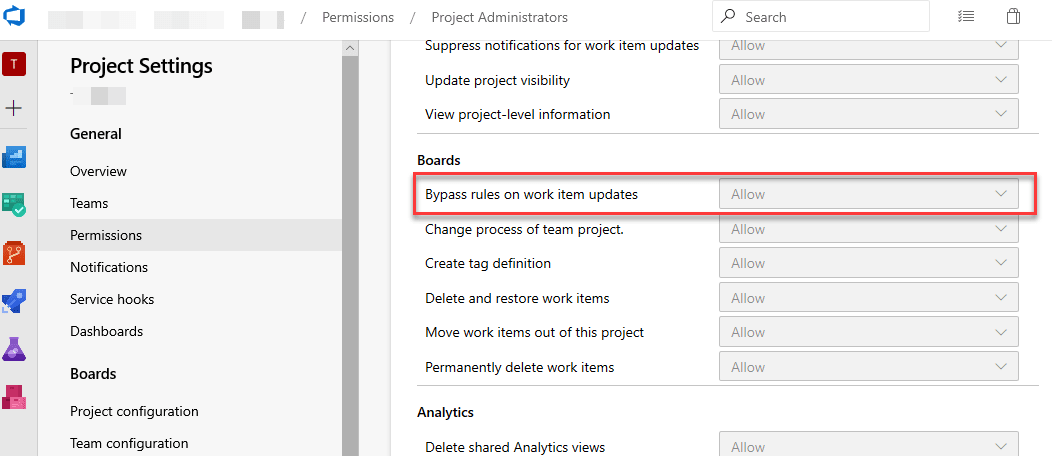
- Azure allows you to configure certain issue templates with custom fields, some being mandatory. Since the integration is generic, you need to access your project, navigate to Project Settings > Permissions > Project Administrators, and ensure you have the option "Bypass rules on work item updates" set to "Allow for the integration to function correctly. Also, if you would like to add tags when creating work items from our platform, please verify that the “Create tag definition” setting is also set to “Allow.”
- On Fluid Attacks' platform, access the Integrations section from the collapsible sidebar.

- Click Use integration in the Azure DevOps card. If your organization has set up this integration before, the card does not show that button, and you have to click the available gear icon (
 ) instead.
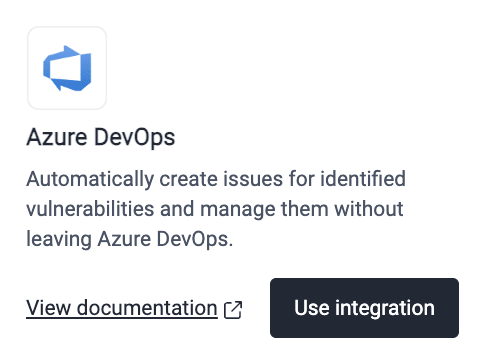
- Click the Connect button corresponding to the group for which you desire the integration.

- Click on Authorize to connect your group to the Azure DevOps account.

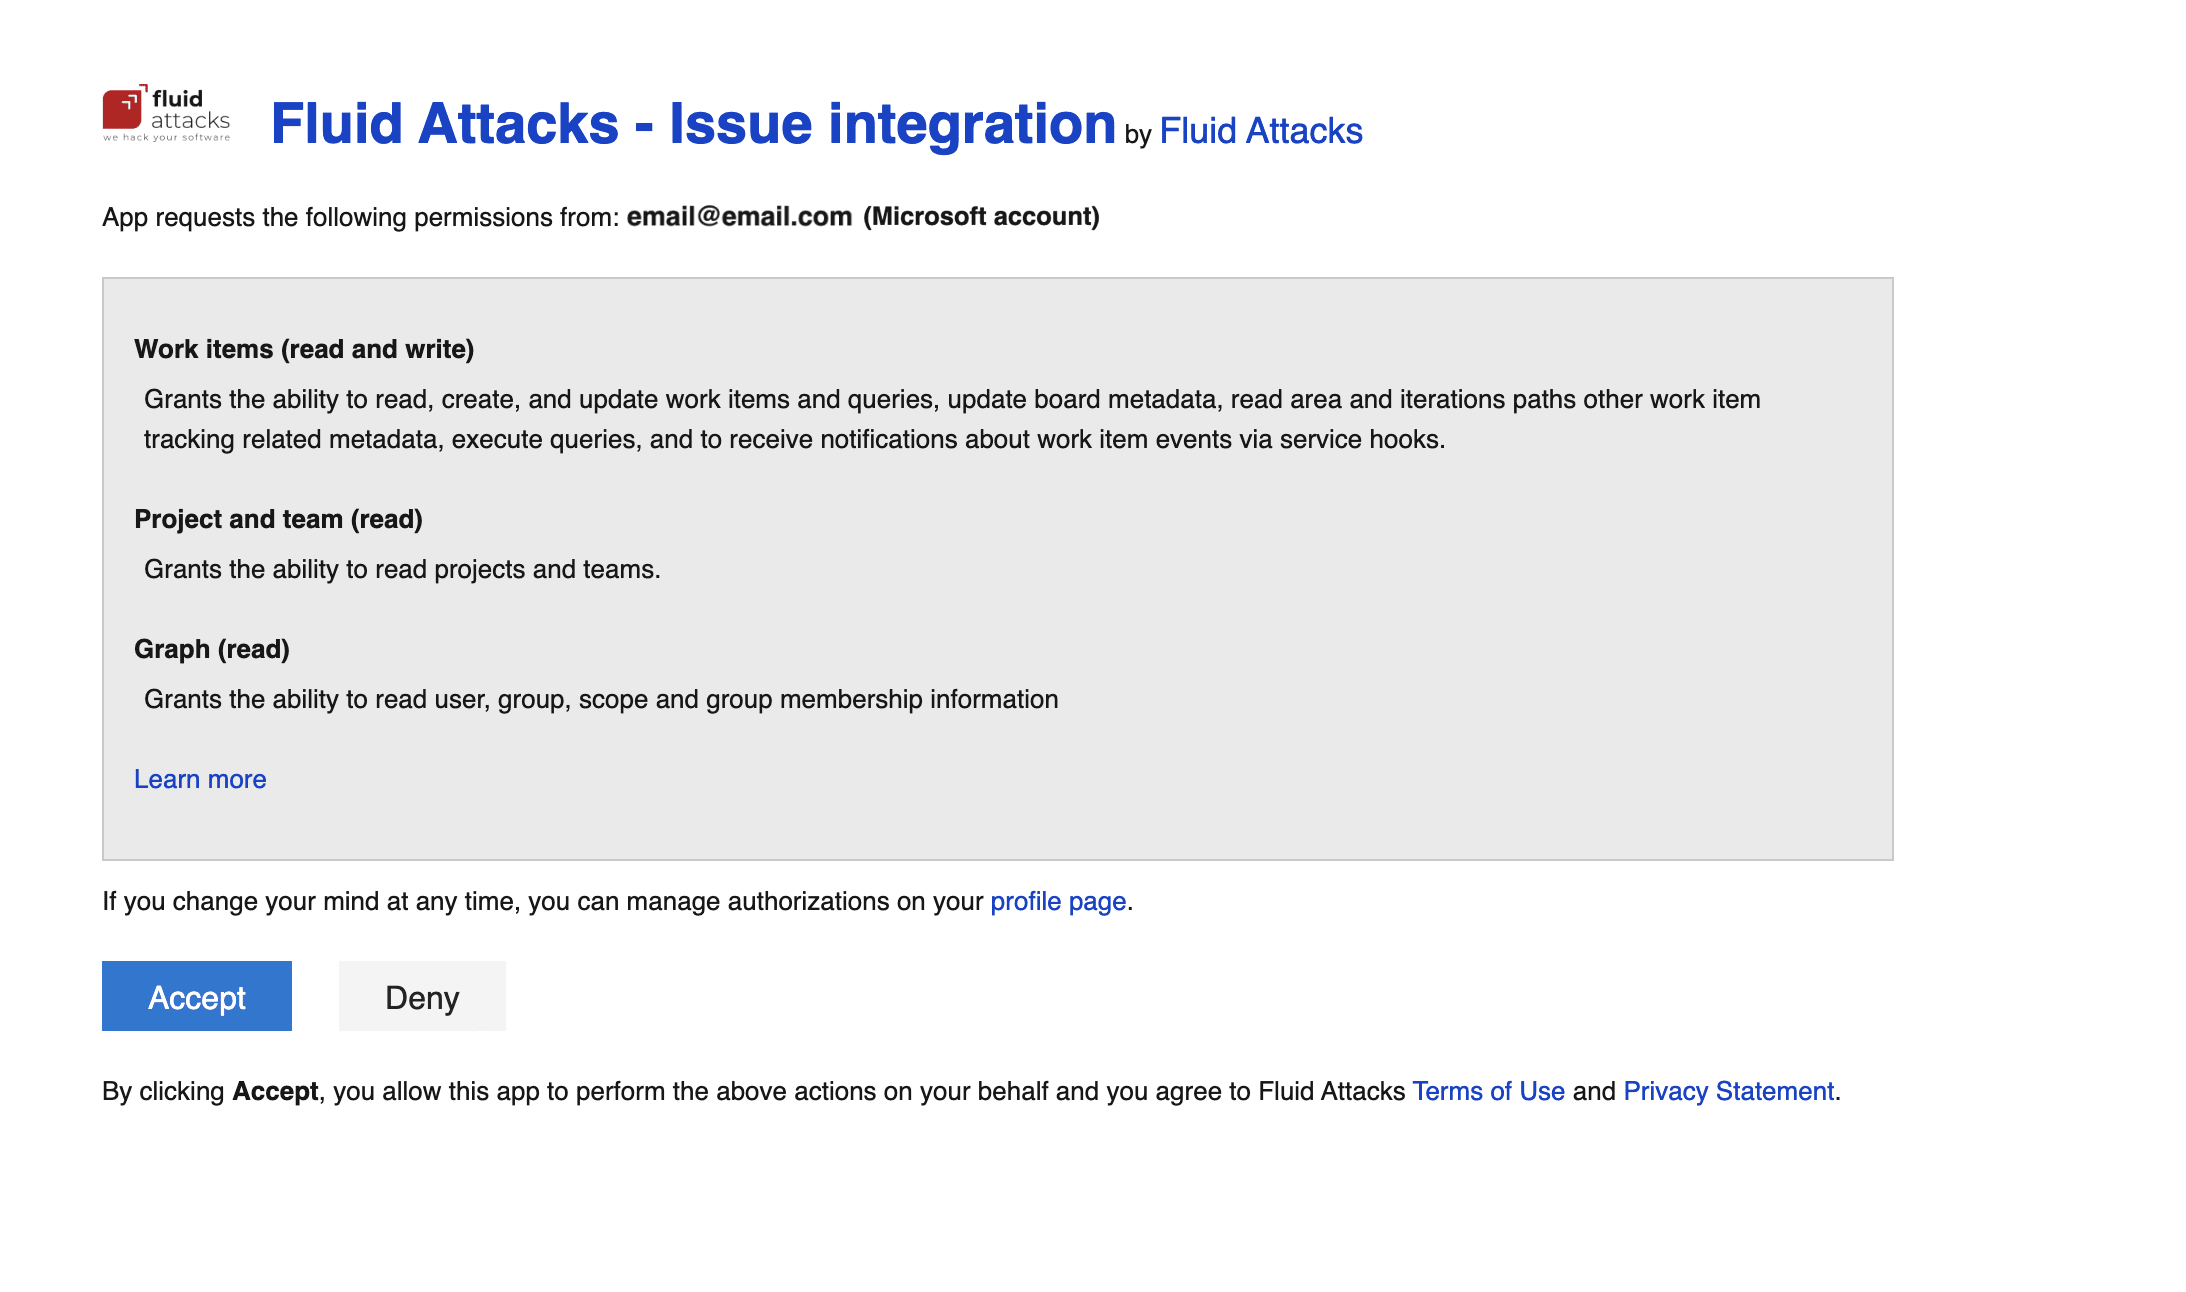
- Read the permissions you give Fluid Attacks with this integration and click the Accept button to agree to them.
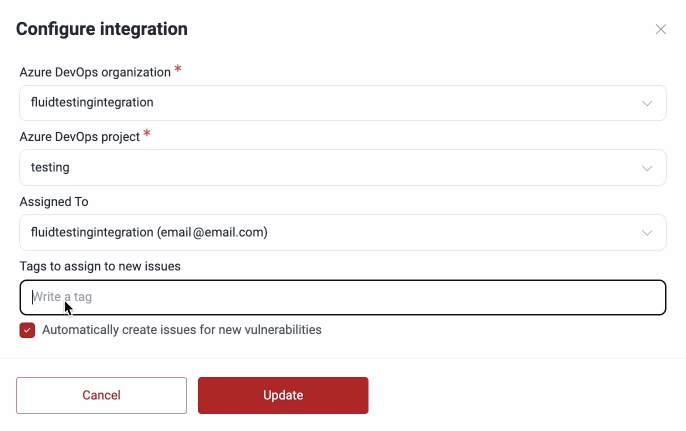
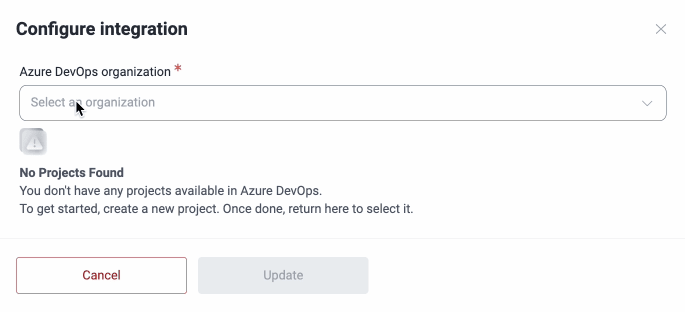
- Once redirected to the platform, enter your Azure DevOps organization. This, as well as the project that you have to select next, must correspond to your organization and project configured on your Azure DevOps, respectively.
- Select the specific Azure DevOps project to connect, select the person who will be assigned the vulnerabilities and write any tags to assign to every new issue. Bear in mind that the options available in the Assigned To field are the emails of all those who have access to the project on Azure and not necessarily to the group on Fluid Attacks' platform.
 Note: Issues are created for vulnerabilities reported after setting up the integration with this feature enabled and not for those reported before.
 - Click the Update button and you will be all set.

This configuration needs to be done by someone with permissions to modify organization settings on Azure DevOps.
Note: To avoid creating duplicate issues, the integration first checks if there is an existing issue with the same title as the type of vulnerability. If it finds a match, it will use it as the parent issue and create only the associated "Tasks" for each individual vulnerability of the type in question.
To continue with this integration, make sure you have permissions to view and create issues in your project on Azure DevOps.

If instead you wish to modify details (e.g., organization, project, creating issues automatically for reported vulnerabilities) of an existing connection, you can click on the Edit button available next to the group name, make the necessary changes and click Update to finish setting up the integration.
This integration works at the group level. Please follow the instructions from step 3 on for each group you want to connect.
To see the automatically created issues on Azure DevOps, access you project and select Boards and then Work items from the left-side menu.
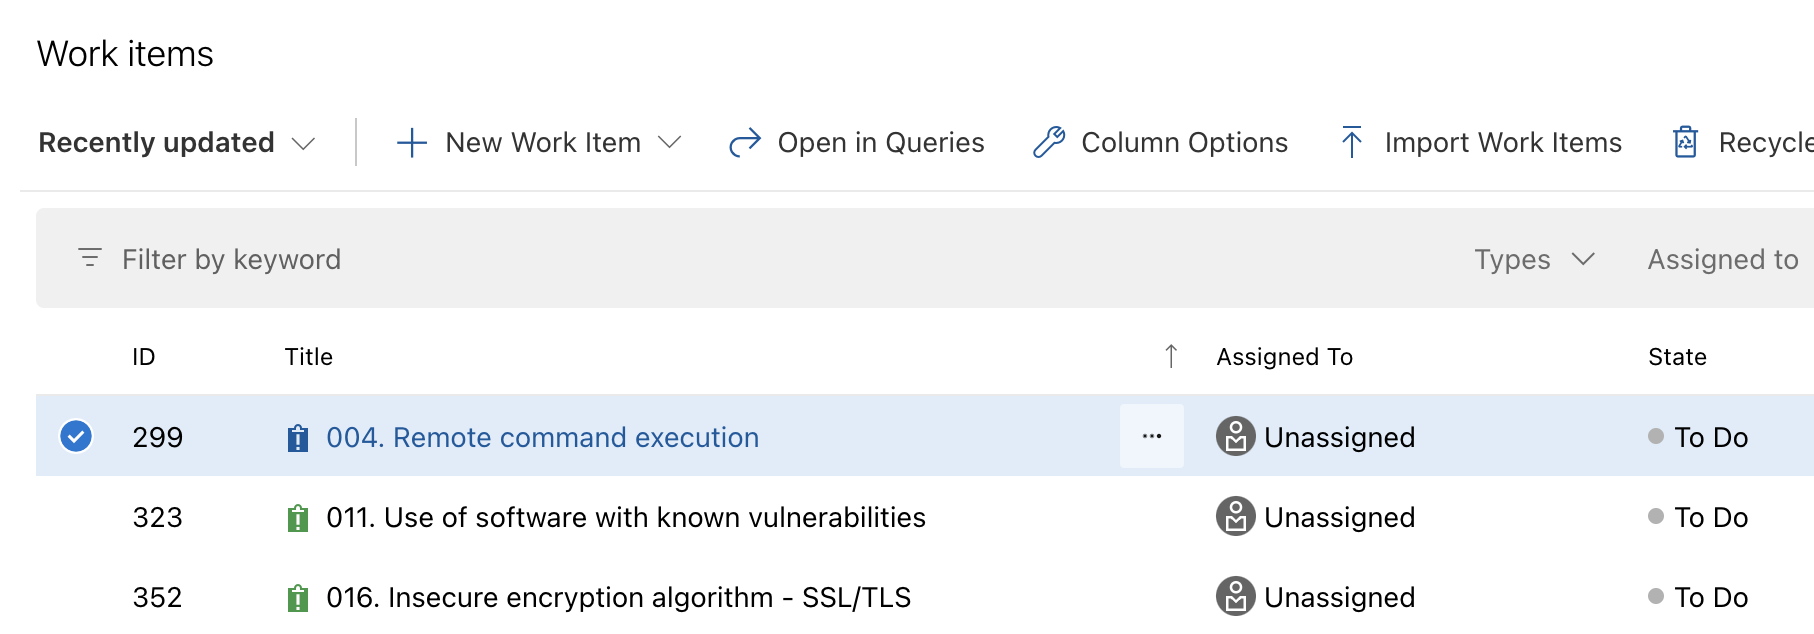
Inside the issue, you can see the Location and Specific details of reported vulnerabilities of the type in question, among other relevant information. Locations are created as child tasks under the issue, and their titles indicate where the vulnerability was found. As explained in step 2, if an existing issue's title matches the title of the reported finding, the locations are reported under the existing issue instead of creating a new one; the same validation is applied to child tasks.

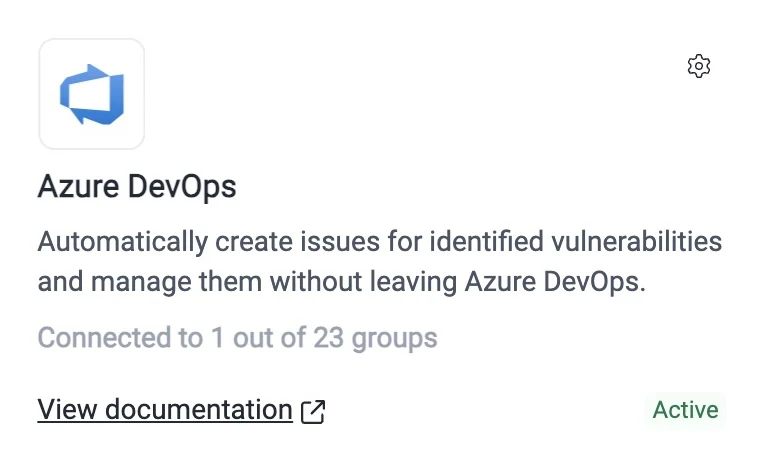
On Fluid Attacks' platform, to show you where you are using this integration across your groups, the Azure DevOps card displays how many of the groups you have access to have the integration configured.
Our Azure integration assumes that it is possible to create items using the ‘Issue’ work item type. If this work item type is not available in your project, or if you are unsure whether it is, please review the following documentation.
Explore other BTS integrations:

Free trial
Search for vulnerabilities in your apps for free with Fluid Attacks' automated security testing! Start your 21-day free trial and discover the benefits of the Continuous Hacking Essential plan. If you prefer the Advanced plan, which includes the expertise of Fluid Attacks' hacking team, fill out this contact form.