Set up the Jira integration

Permissions required: To set up this integration, you need the permission “Administer Jira” on Jira Cloud.
After you have installed the Fluid Attacks app for Jira Cloud, follow these steps to set up the integration:
- Navigate to Manage apps, either from the notification you got after installation or from the menu accessible by clicking on the three points next to Apps in the left-side menu.
- Select Settings under Fluid Attacks in the left-side menu.
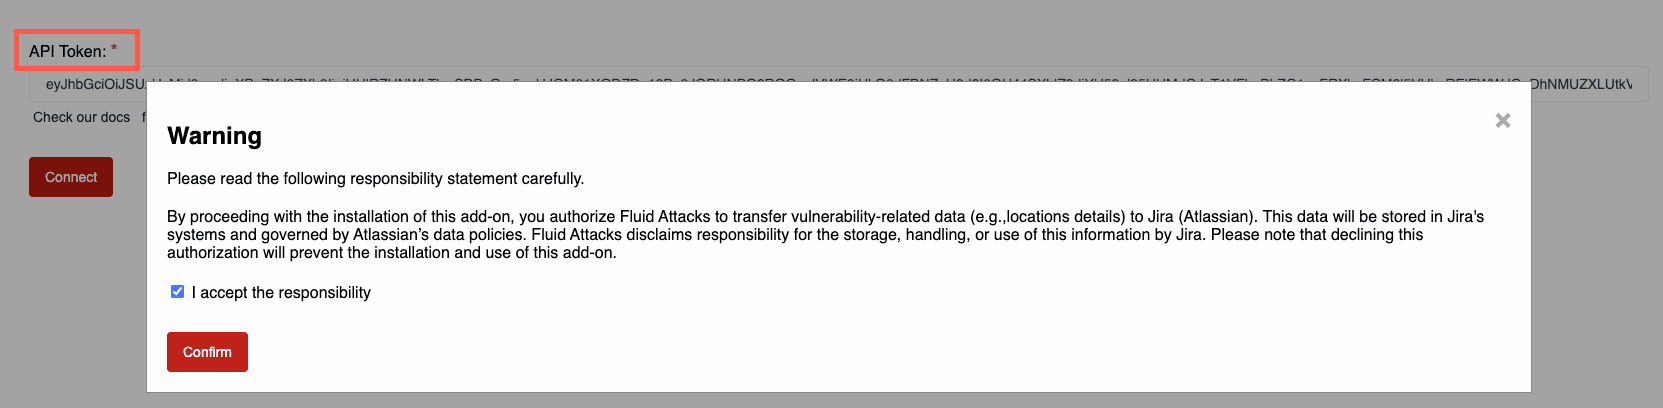
- Enter an API token. To generate it, enter the user menu on Fluid Attacks' platform, click on API token and then Add token.
- Carefully read Fluid Attacks' disclaimer. Please bear in mind that you are agreeing to Atlassian's data policies. Click on Confirm to proceed.
- Go back to your project, click on the three dots next to the project name in the left-side menu, and choose Project settings.
- Select Apps > Fluid Attacks from the left-side menu.
- Provide the same API token you used in step 2 and click on Connect.
- Click on the drop-down menu, select the group you want to integrate, and click on Save. You can choose only groups you have access to on Fluid Attacks' platform.


Note: To generate the API token your client role on Fluid Attacks’ platform must be either User, Vulnerability Manager or Group Manager.

If the screen seems to freeze after clicking Confirm, refresh the page to see whether the authentication was successful already.


You can now go back to your project's main screen and click on Fluid Attacks from the project menu.

In the app, if you are the Jira instance admin or have the permission "Administer Jira," you can see the reported vulnerabilities of the group you chose in step 8 with their details and the options to link to a Jira issue or create a Jira issue to link.

Note: To access linked vulnerabilities and request reattacks on Jira Cloud, you must have the permission to assign or be assigned issues.
Bear in mind that if you need to change the group for which you are viewing reported vulnerabilities, you have to navigate to Project settings > Apps > Fluid Attacks and select the desired group.


Free trial
Search for vulnerabilities in your apps for free with Fluid Attacks' automated security testing! Start your 21-day free trial and discover the benefits of the Continuous Hacking Essential plan. If you prefer the Advanced plan, which includes the expertise of Fluid Attacks' hacking team, fill out this contact form.