Assign treatments
A treatment represents the organizational decision that you make concerning your approach to a vulnerability. This page presents a guide on how to apply treatments to reported vulnerabilities on Fluid Attacks' platform.
Define a treatment for a vulnerability
 Role required: Vulnerability Manager or Group Manager
Follow these steps to define the treatment for a detected vulnerability:
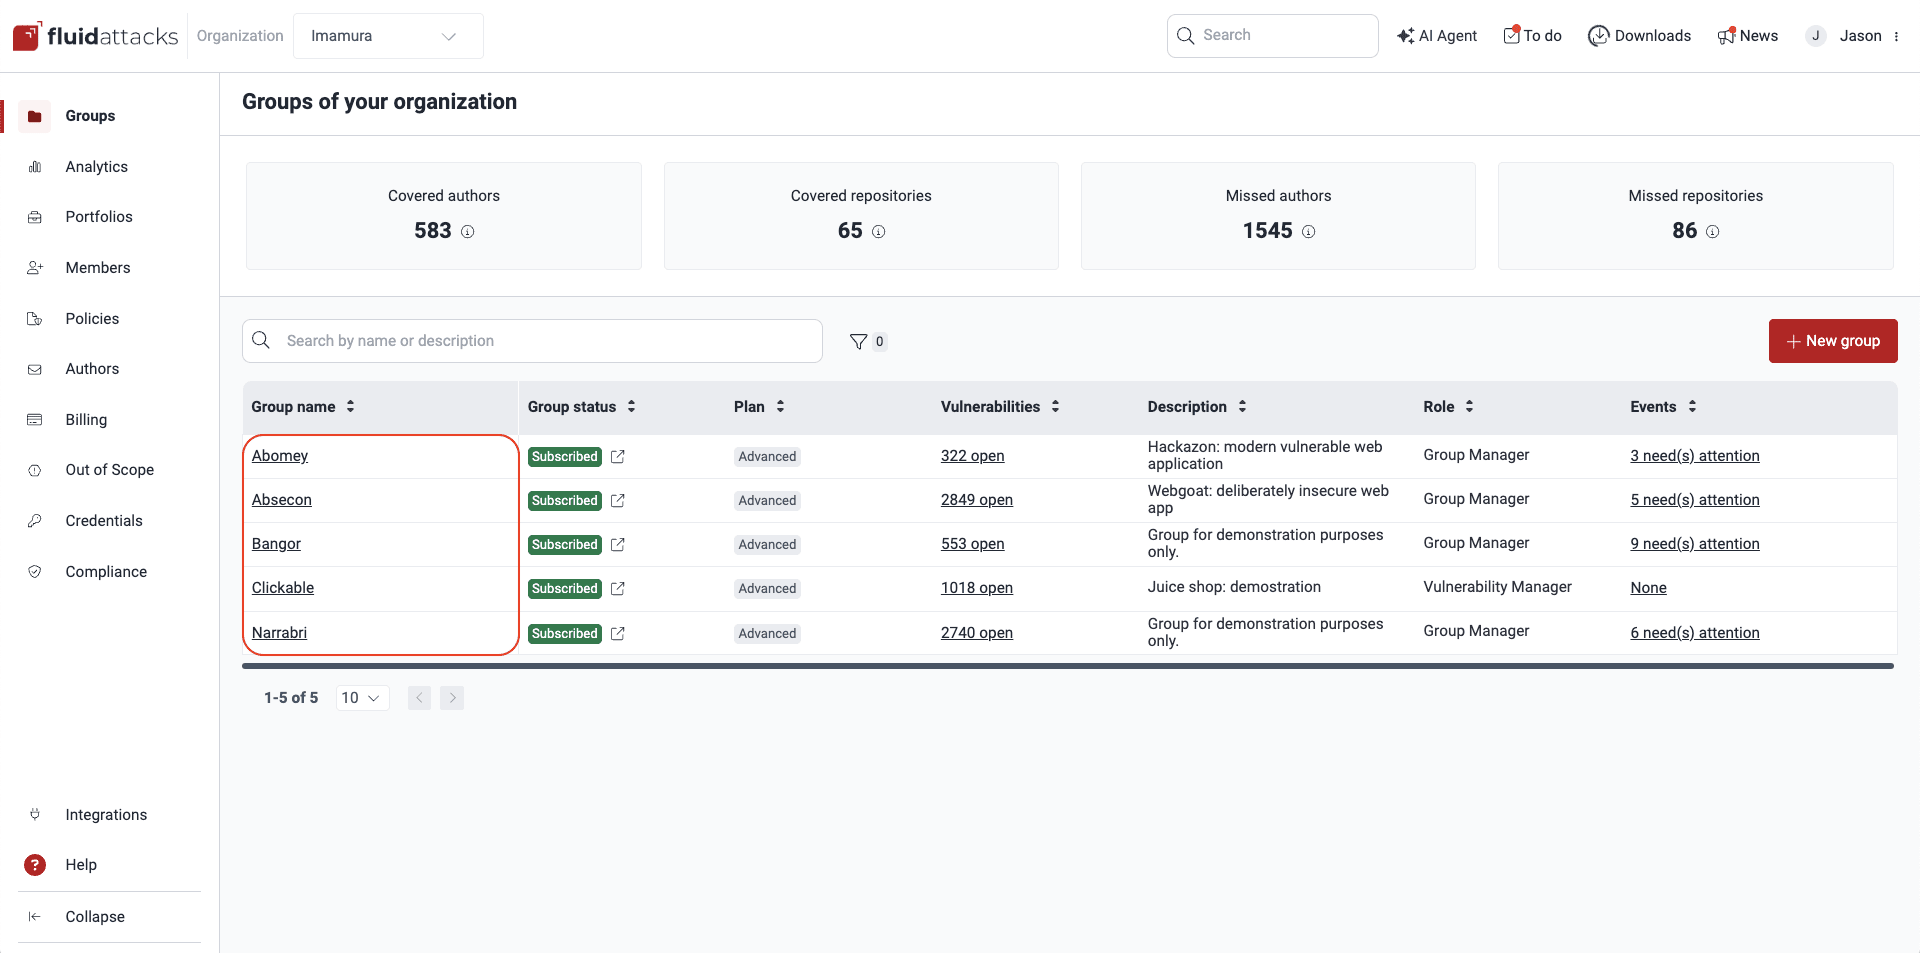
- Access the group where the vulnerability is reported.
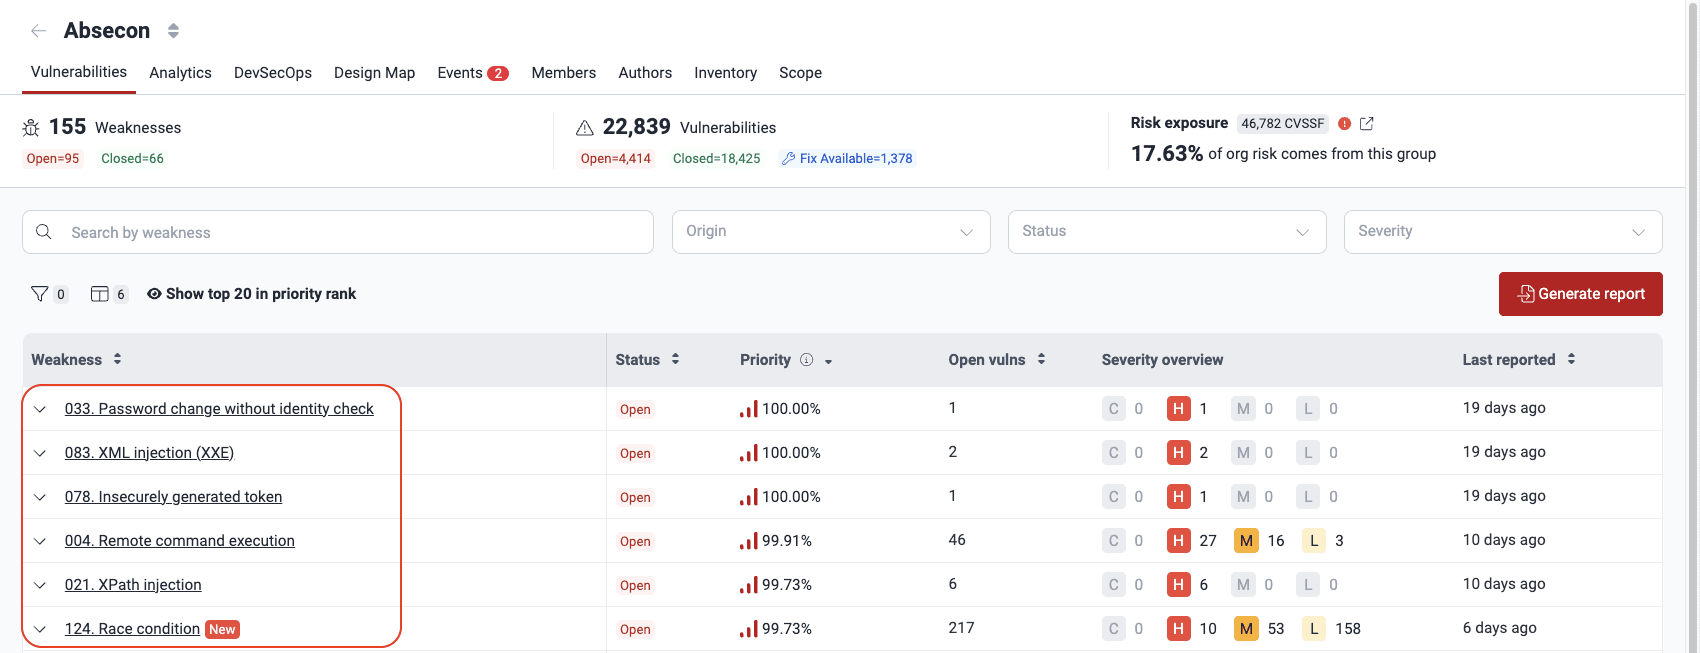
- In the group's Vulnerabilities section, select the weakness in question. You can also go to Vulnerabilities directly from an email link, if you received a notification about it.
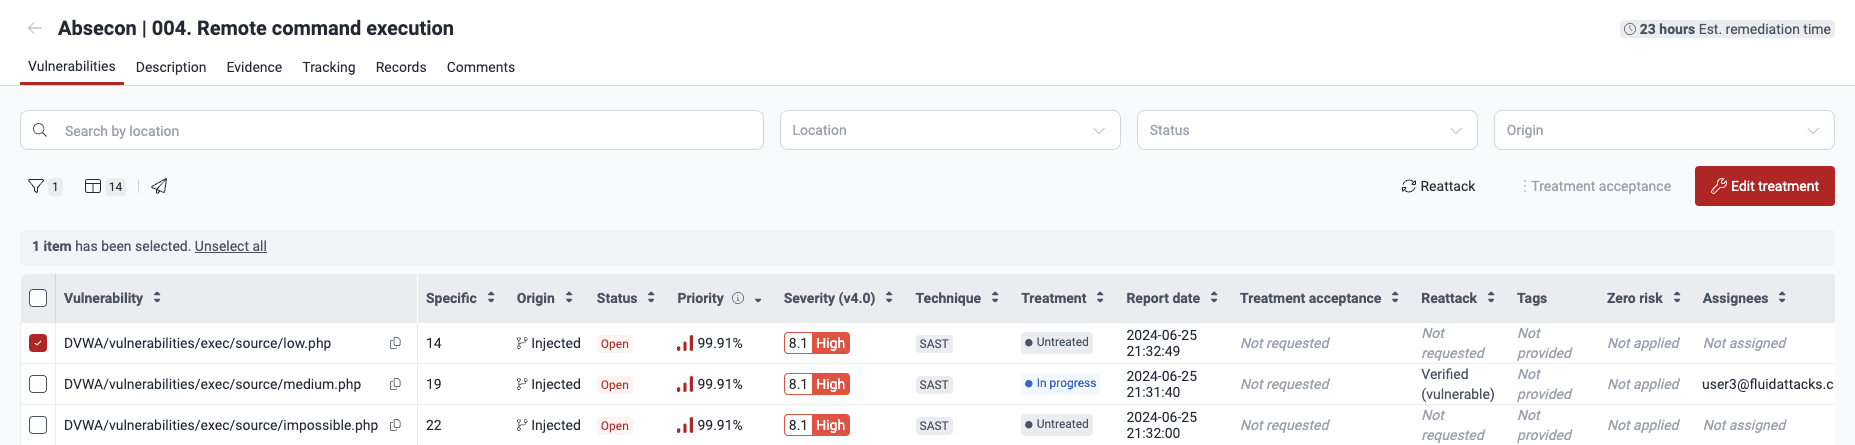
- Find the vulnerability for which you need to define a treatment, select the issue by checking the box next to it and click on the Edit treatment button.
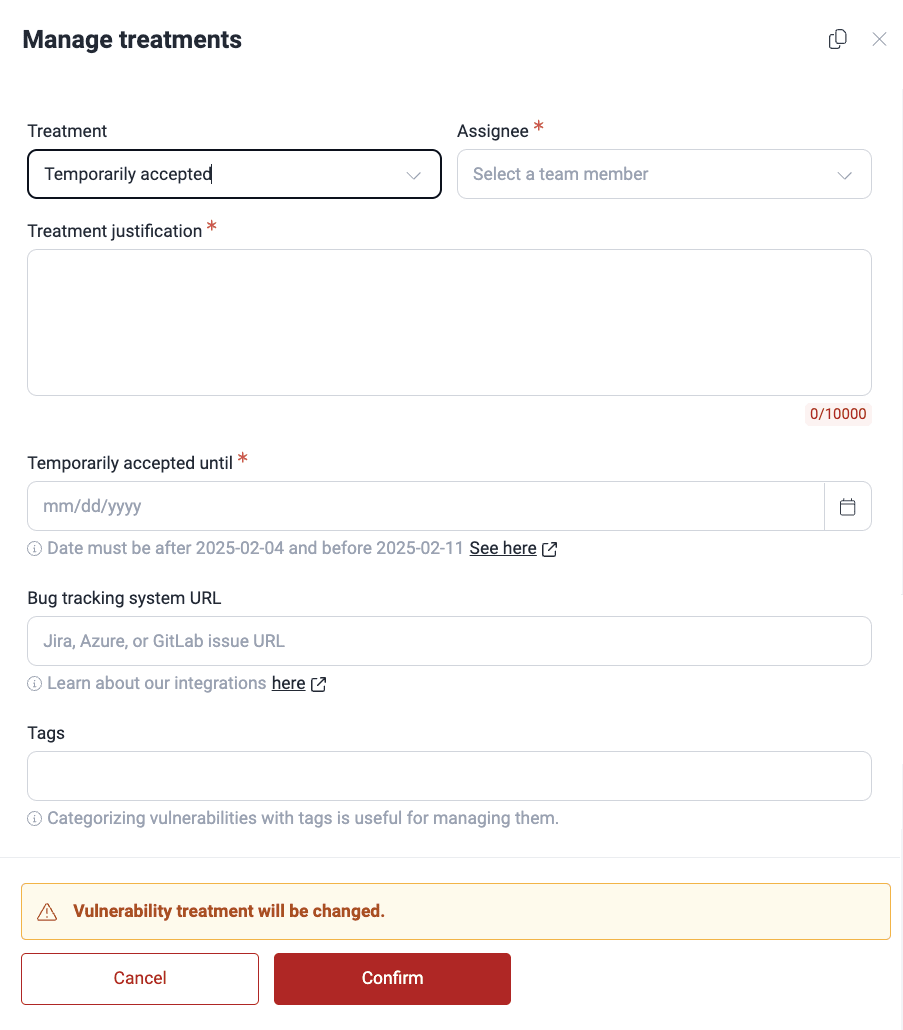
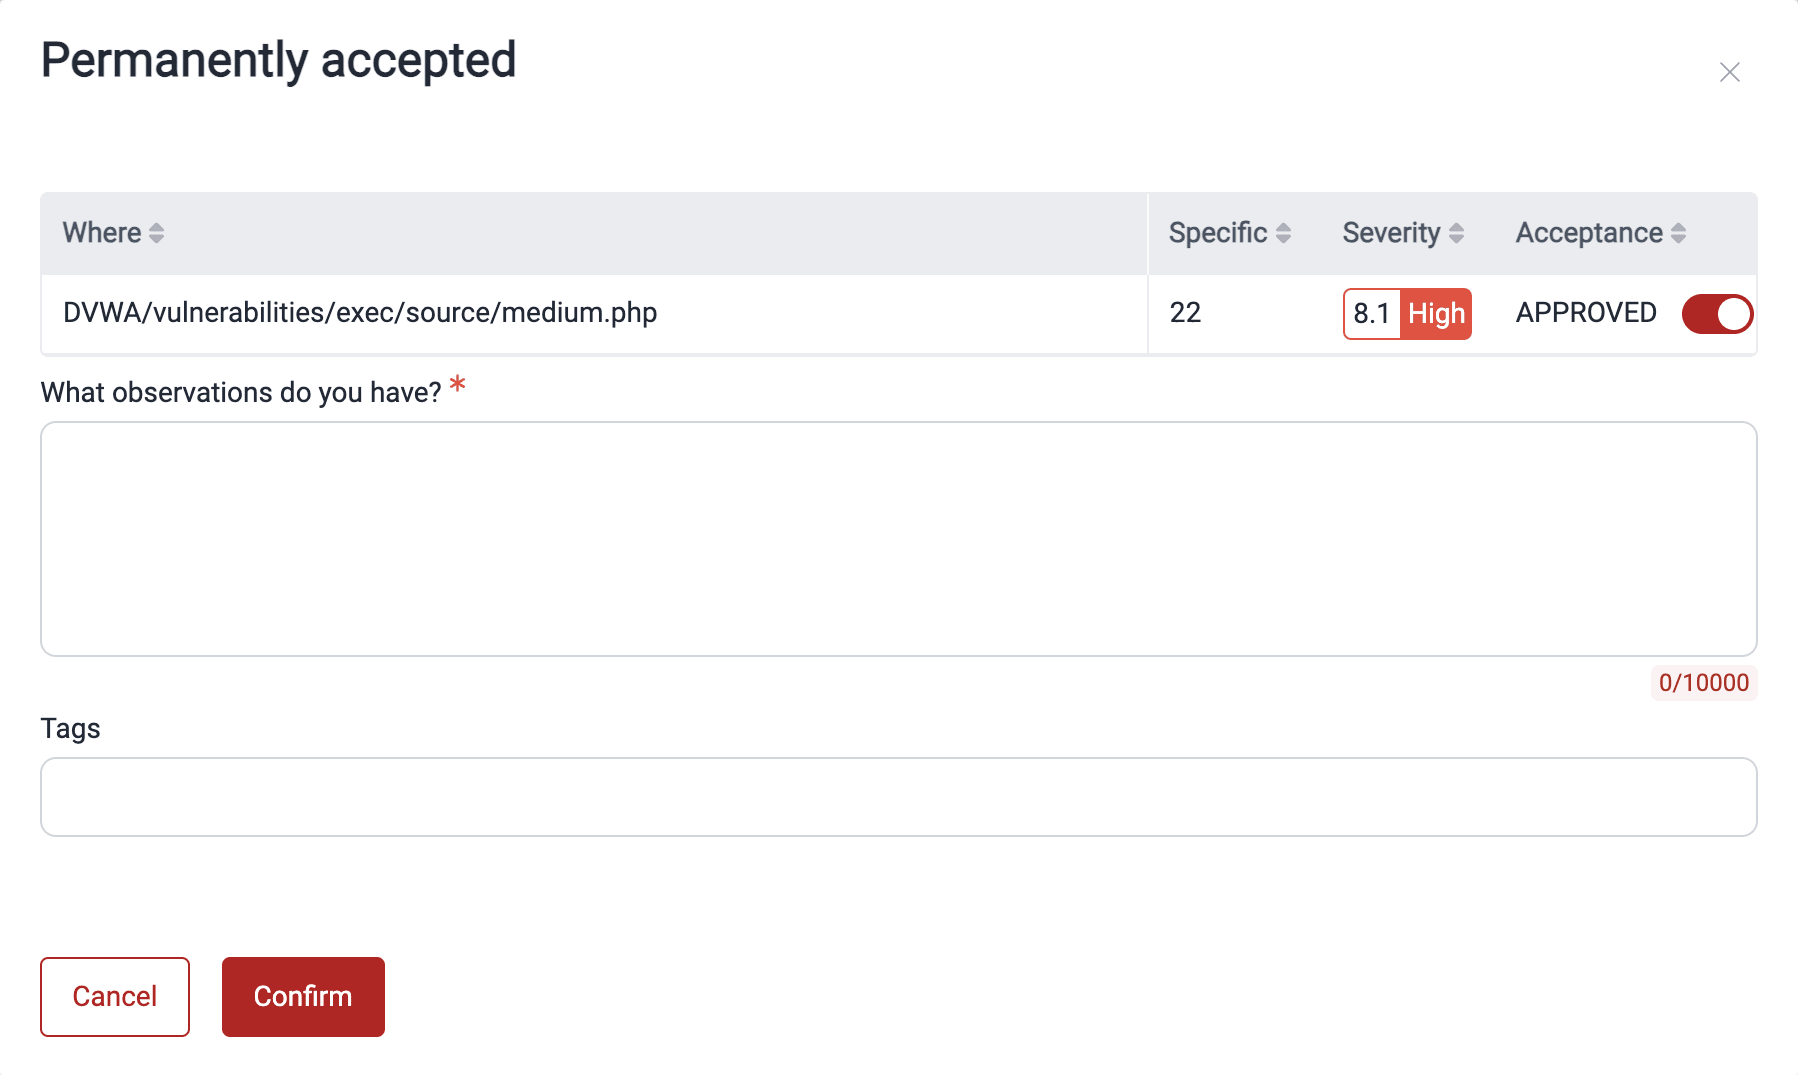
- In the pop-up window, select the treatment for the vulnerability.
- Untreated: The default state of a newly discovered vulnerability, indicating no action is taken.
- In progress: Acknowledges the vulnerability and assigns it to a member with the User role for remediation. After successful treatment assignment, the member sees this vulnerability in their To do section.
- Temporarily accepted: The vulnerability and its associated risks are accepted for a defined period. (Requires specifying a treatment date.)
- Permanently accepted: The vulnerability and its associated risks are accepted indefinitely. At any time, a vulnerability with this treatment can be changed to 'In progress'.
- Request zero risk: Used when your organization determines that the vulnerability poses no threat. A request is sent to Fluid Attacks to remove the vulnerability from the report. If Fluid Attacks determines otherwise, it remains reported.
- Complete the form with the required information.
- Assignee: The member responsible for addressing the vulnerability (not present when 'Untreated' or 'Request zero risk' are selected)
- Treatment justification: Explanation for the chosen treatment
- Temporarily accepted until: The date until which the 'Temporarily accepted' treatment is valid (only present when choosing this treatment)
- Tags: Labels to help categorize and manage the vulnerability (optional)
- Bug-tracking system URL: URL of the issue in your bug-tracking system (BTS) related to this vulnerability (not present when 'Untreated' or 'Request zero risk' are selected)
- Click on Confirm when you are done.

If assigning the same treatment to multiple vulnerabilities, you can select them and then click Edit treatment.

These are the treatments available in the platform:

Note: If you have the User role and select any of the acceptance treatments, your edit is handled as a request which has to undergo consideration by a member with the Vulnerability Manager or Group Manager role. Read further to learn how to approve treatments with these roles.
Here are the descriptions of the remaining fields:

You can use tags to facilitate searching for vulnerabilities reported in the Locations table. Moreover, you can go to Analytics to see the number of vulnerabilities for each of the tags you or other team members have created.
Alternatively, as step 3, you may simply click on the vulnerability's location instead. Then, in the pop-up window, switch to the Treatments tab and proceed from step 4 as instructed above.

Assign fix work to members
Role required: Vulnerability Manager or Group Manager
Members with the User role can assign fix work to themselves.
Assigning fix work to members is a crucial step in effective vulnerability management, as it ensures accountability and that identified vulnerabilities are actively addressed and remediated in a timely manner. Use Fluid Attacks' platform to facilitate this task:
- Go to your group's Vulnerabilities section.
- Select the type of vulnerability in question. You can also go to the type directly from an email link, if you received a notification about it.
- From Locations, select the specific vulnerability whose remediation you want to assign to yourself or a team member.
- Select the 'In progress' treatment and choose the assignee.
- Provide any necessary instruction or an explanation for the assignment in Treatment justification.
- Modify other values if needed (see the descriptions above) and click Confirm to apply the treatment.
To do this, you can either (a) click the check box next to the vulnerability and then the Edit button or (b) click on the vulnerability's location and then, in the pop-up window, switch to the Treatments tab.

Notes:
- You can assign 'Untreated' vulnerabilities for remediation or reassign 'In progress' vulnerabilities.
- You can even assign 'Temporarily accepted' and 'Permanently accepted' vulnerabilities.
- Vulnerability Managers and Group Managers can assign vulnerabilities to any group member.
- Only Fluid Attacks staff can assign vulnerabilities to other Fluid Attacks members.
- The Assigned dropdown list only shows valid options for assignment.
The newly assigned member receives an email notification
telling them what vulnerability is assigned to them and the group where it is reported. And members subscribed to treatment updates notifications are also informed of the assignment. In both cases, the email provides a link to the relevant Locations section.
The person who is assigned fix work can find the newly added task in their To do section, accessible from the top-right menu. A red dot in this section's icon represents pending remediation work. To learn to use this section, read See vulnerabilities assigned to you.

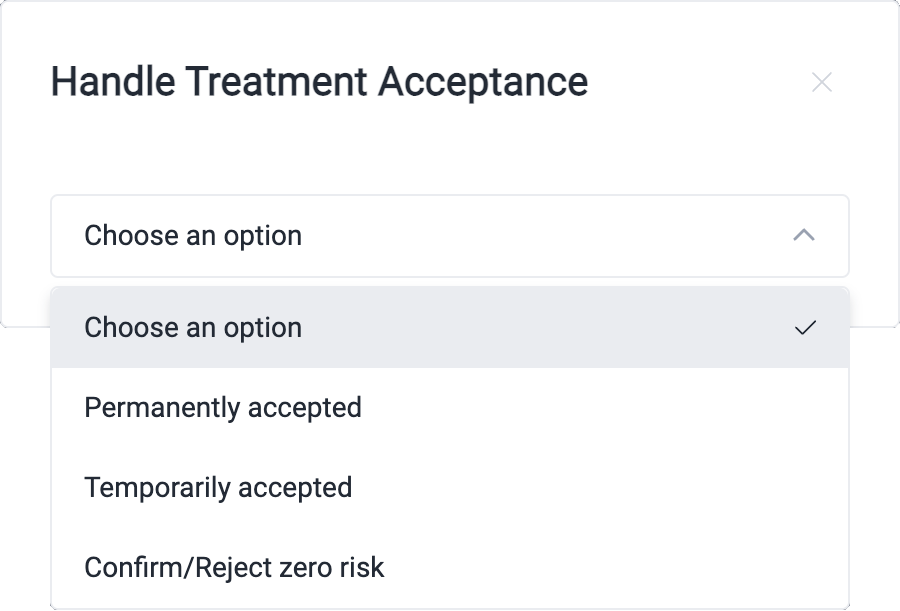
Approve or reject vulnerability acceptance treatments
Role required: Vulnerability Manager or Group Manager
Fluid Attacks' platform allows for accepting vulnerabilities temporarily or permanently, which means doing no fix work to address them for a defined period or indefinitely, respectively. If you have the Vulnerability Manager or Group Manager role, and you have the Treatment updates notification enabled, you receive emails about your team's vulnerability acceptance requests. You have a deadline of five days to respond with your approval or rejection. In case of no response, the vulnerability's treatment reverts to 'Untreated' or 'In progress', whichever was previous to the request.
The following are the steps to respond to acceptance requests:
- Locate the vulnerability in question, either following the link in the email or going to your group's Vulnerabilities section and accessing the type's Locations section.
- Click the Treatment acceptance option.
- In the pop-up window, specify the treatment request you are responding to.
- Choose to approve or reject the request using the toggle and provide your feedback.
- To apply your decision, click on Confirm.

If you reject the request, the vulnerability's treatment will revert to 'In progress' or 'Untreated', whichever was its treatment before the request.
Free trial
Search for vulnerabilities in your apps for free with Fluid Attacks' automated security testing! Start your 21-day free trial and discover the benefits of the Continuous Hacking Essential plan. If you prefer the Advanced plan, which includes the expertise of Fluid Attacks' hacking team, fill out this contact form.